
The Manor Golf Course
Designer: Tom Watson
The golf course at Manor Golf & Country Club was designed by legendary golfer, Tom Watson. A rare and unique gem, as it’s the only course he…
The golf course at Manor Golf & Country Club was designed by legendary golfer, Tom Watson. A rare and unique gem, as it’s the only course he’s designed in the state of Georgia and one of only 16 in the world. As an eight-time major winner and member of the World Golf Hall of Fame, Watson brought the same drive and determination to the design of The Manor as he did to his professional golf career. Players of all skill levels will be both challenged and thoroughly entertained by this golf course every time they play.
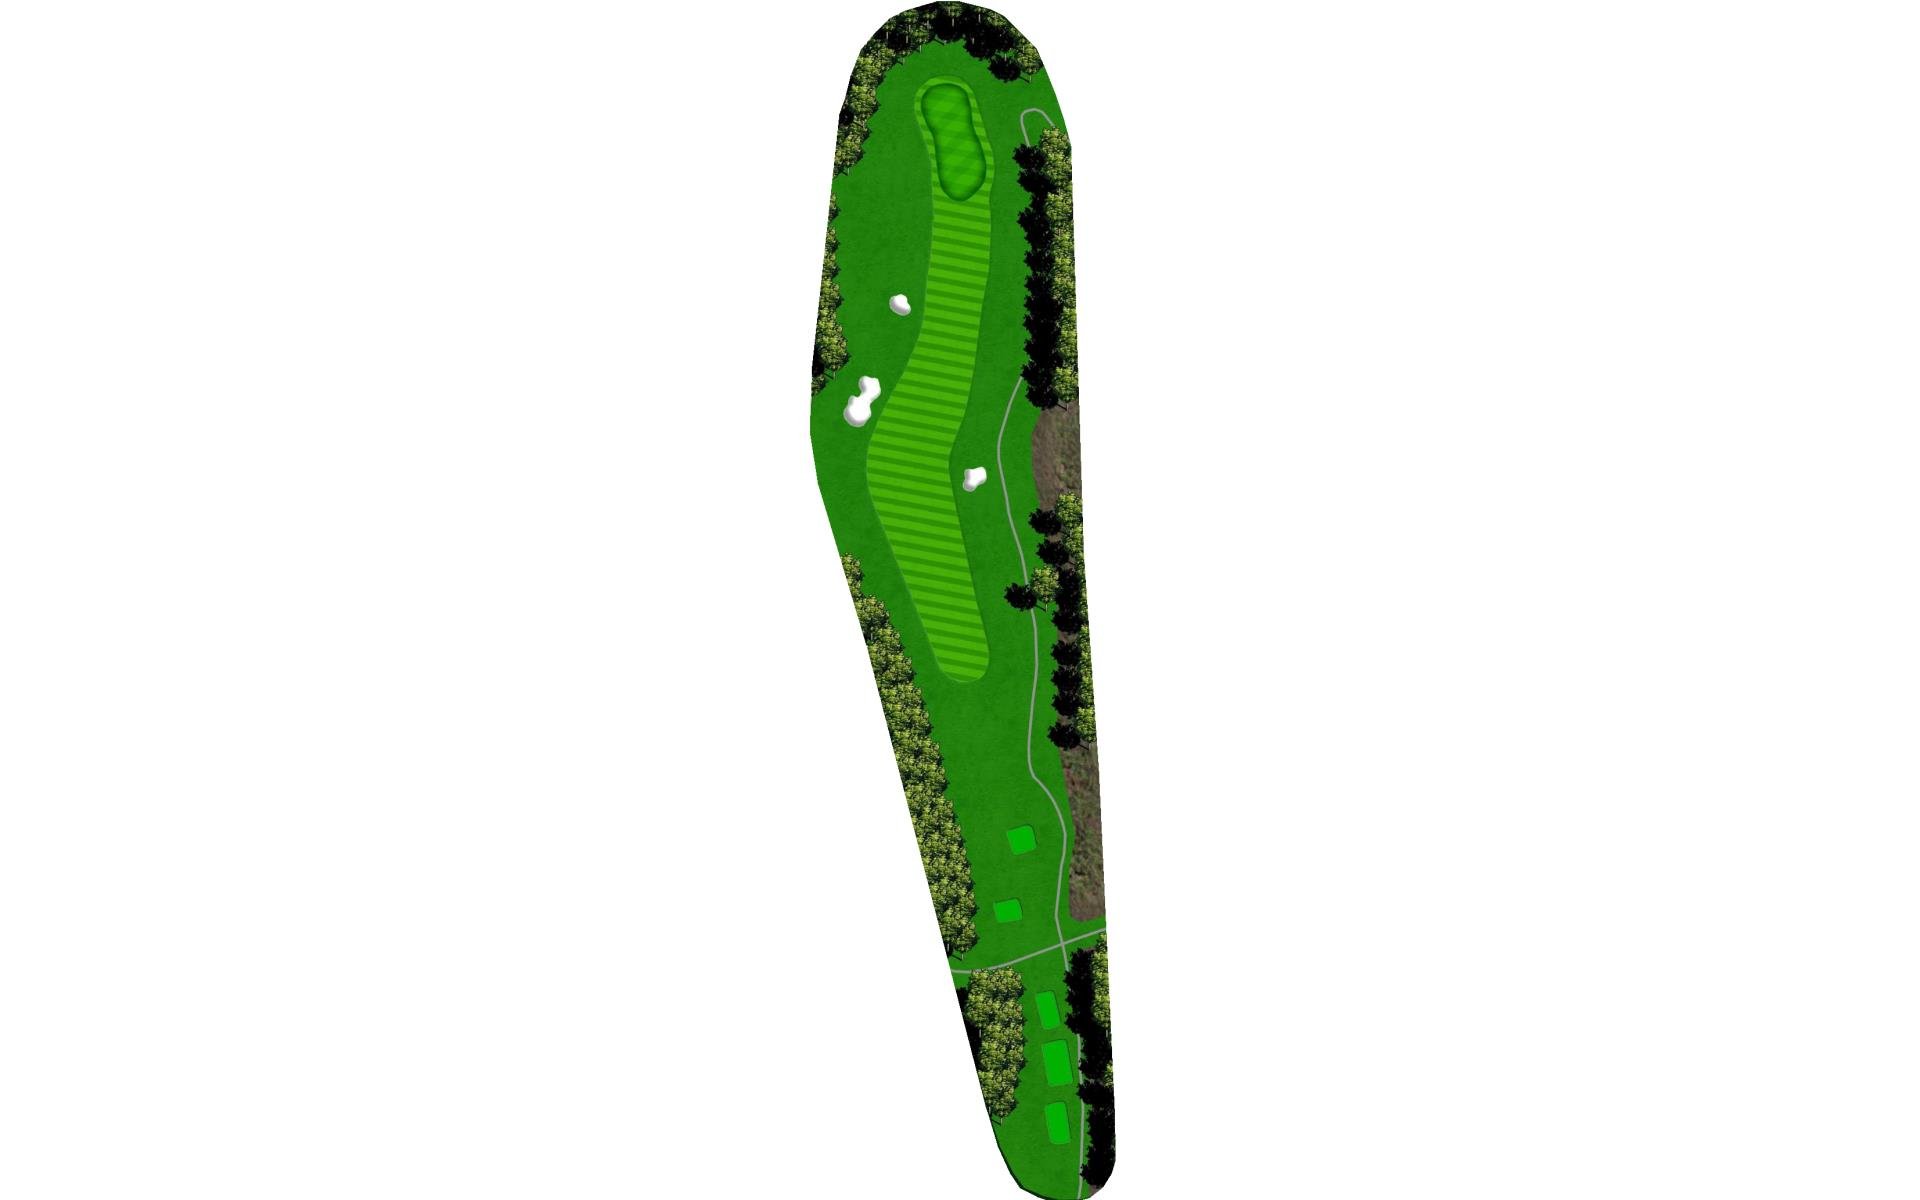
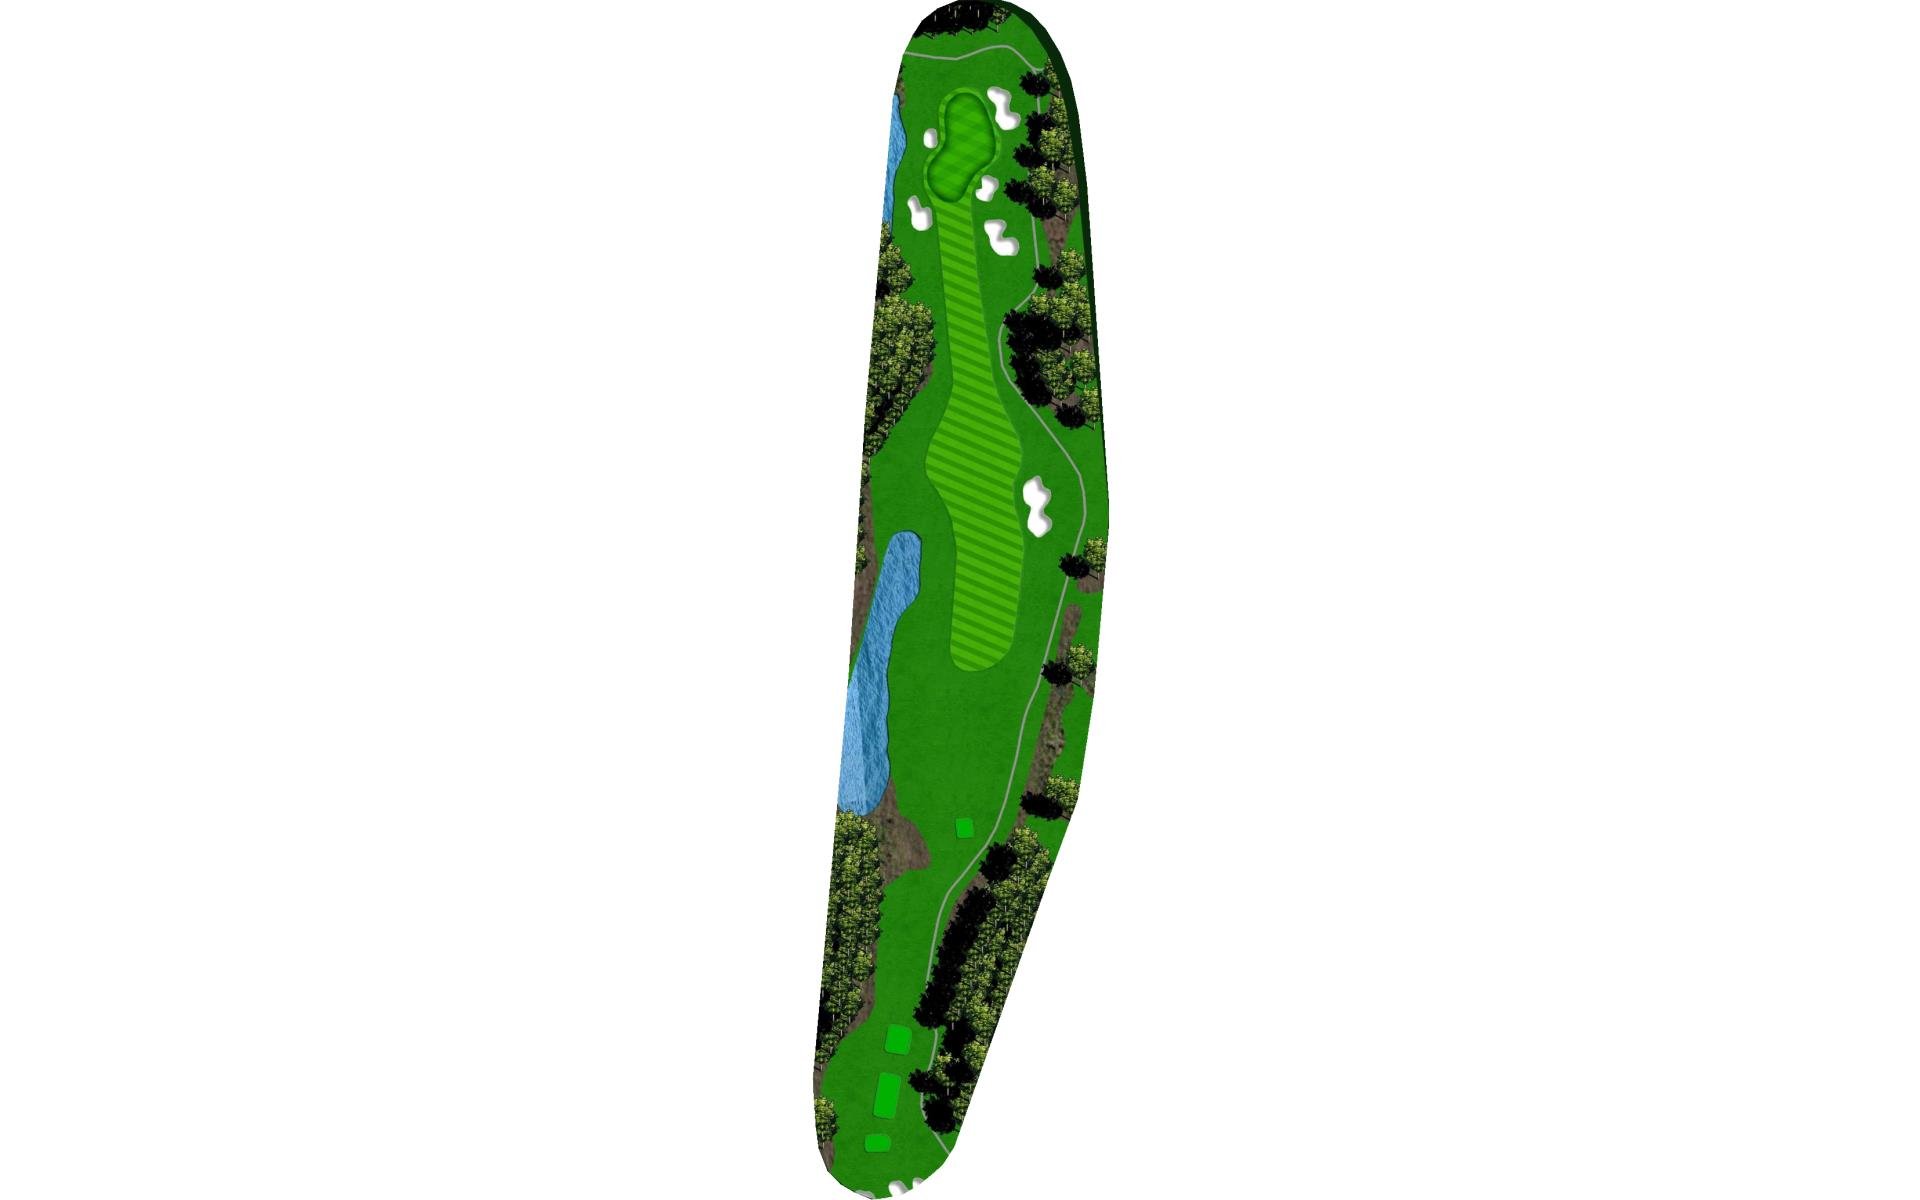
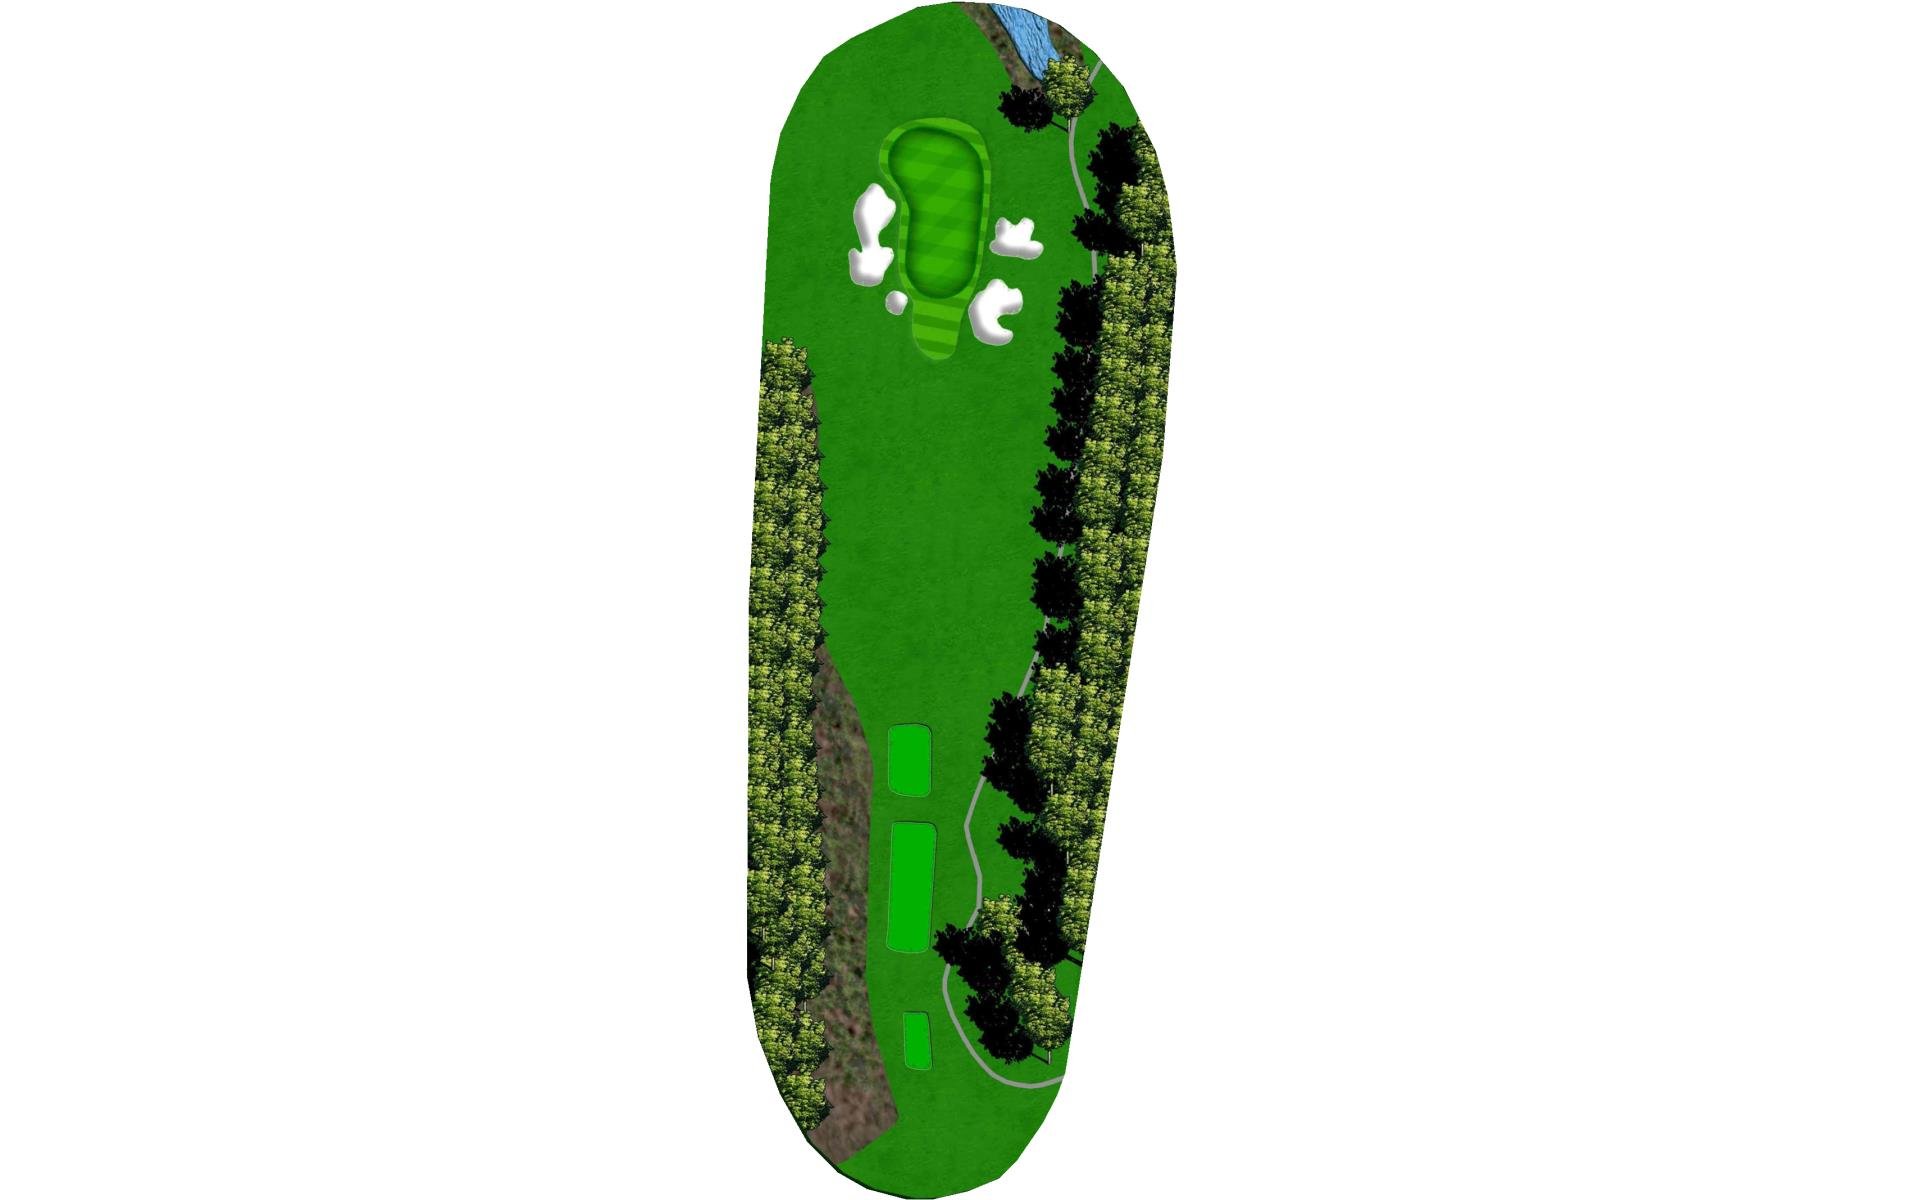
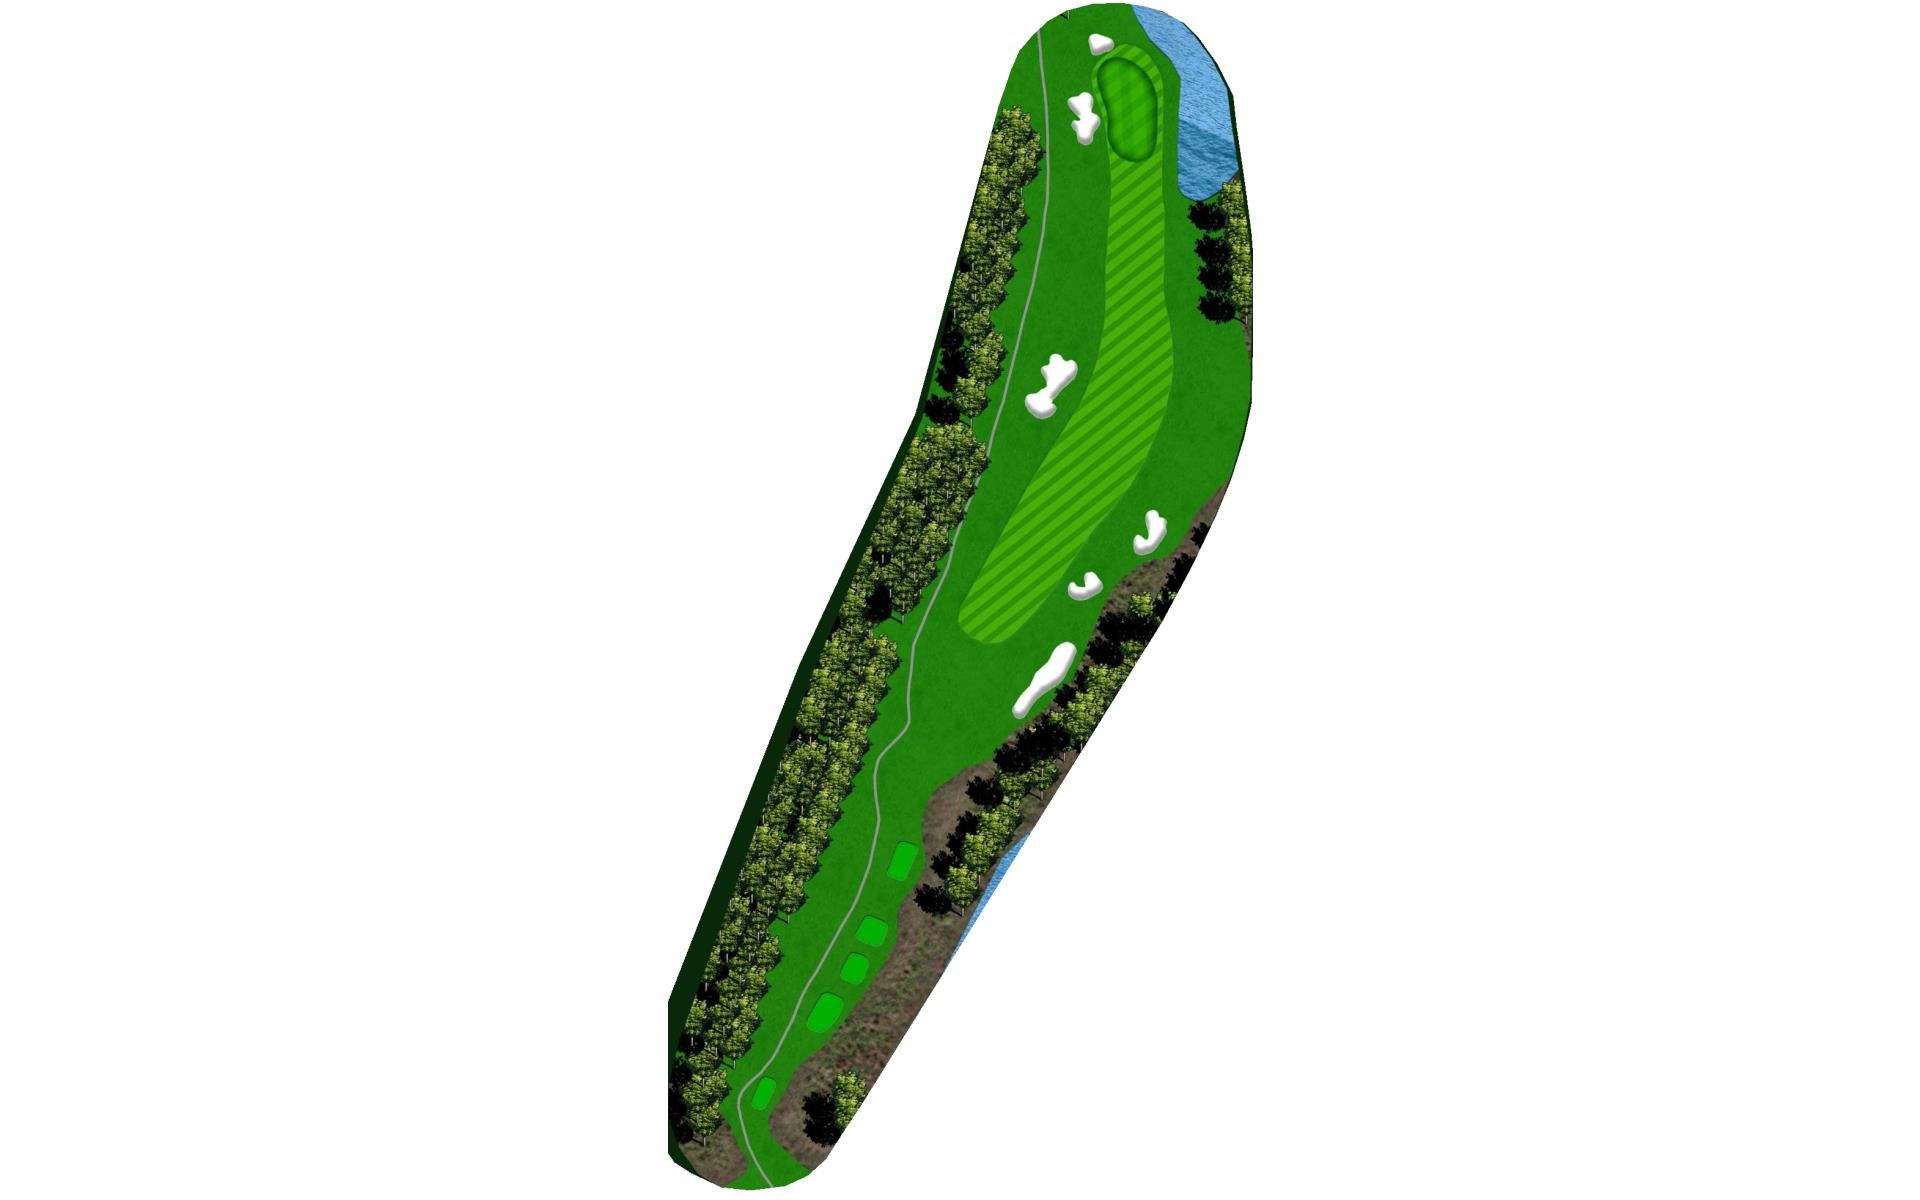
# 1 /
Par: 4
Handicaps:
Men's 11
Women's 9
Yardage by Tee:
WATSON 405
BLUE 380
WHITE 357
YELLOW 315
GREEN 287
Slope:
Watson 142
Pro Tips
The opening hole offers players plenty of fairway with even more help right. Approach shots play uphill the rest of the way to the green, so an extra club is often required.

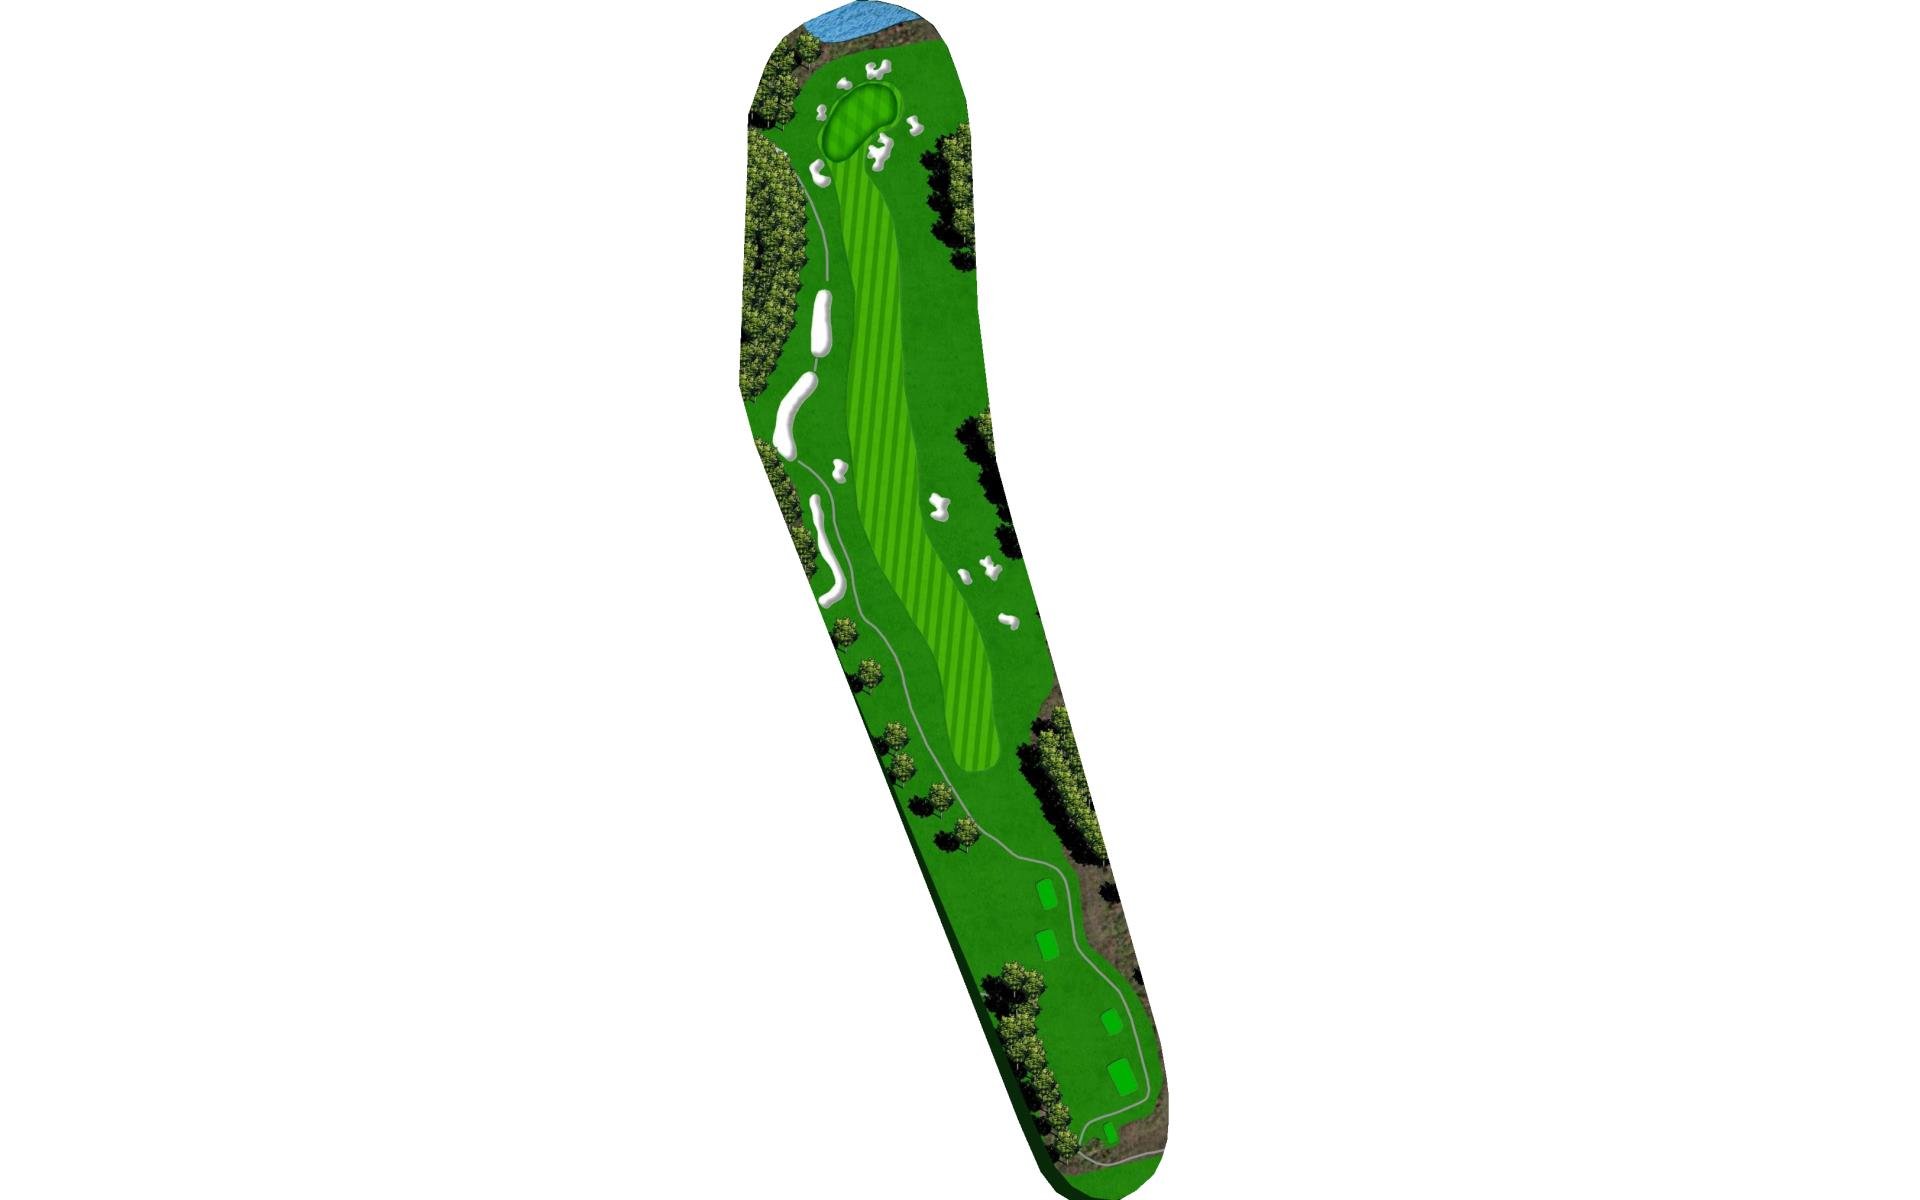
# 2 /
Par: 4
Handicaps:
Men's 9
Women's 11
Yardage by Tee:
WATSON 423
BLUE 296
WHITE 360
YELLOW 341
GREEN 273
Slope:
Blue 138
Pro Tips
Hitting the fairway on this short par 4 will leave players a mid-short iron approach shot into a well-protected green.
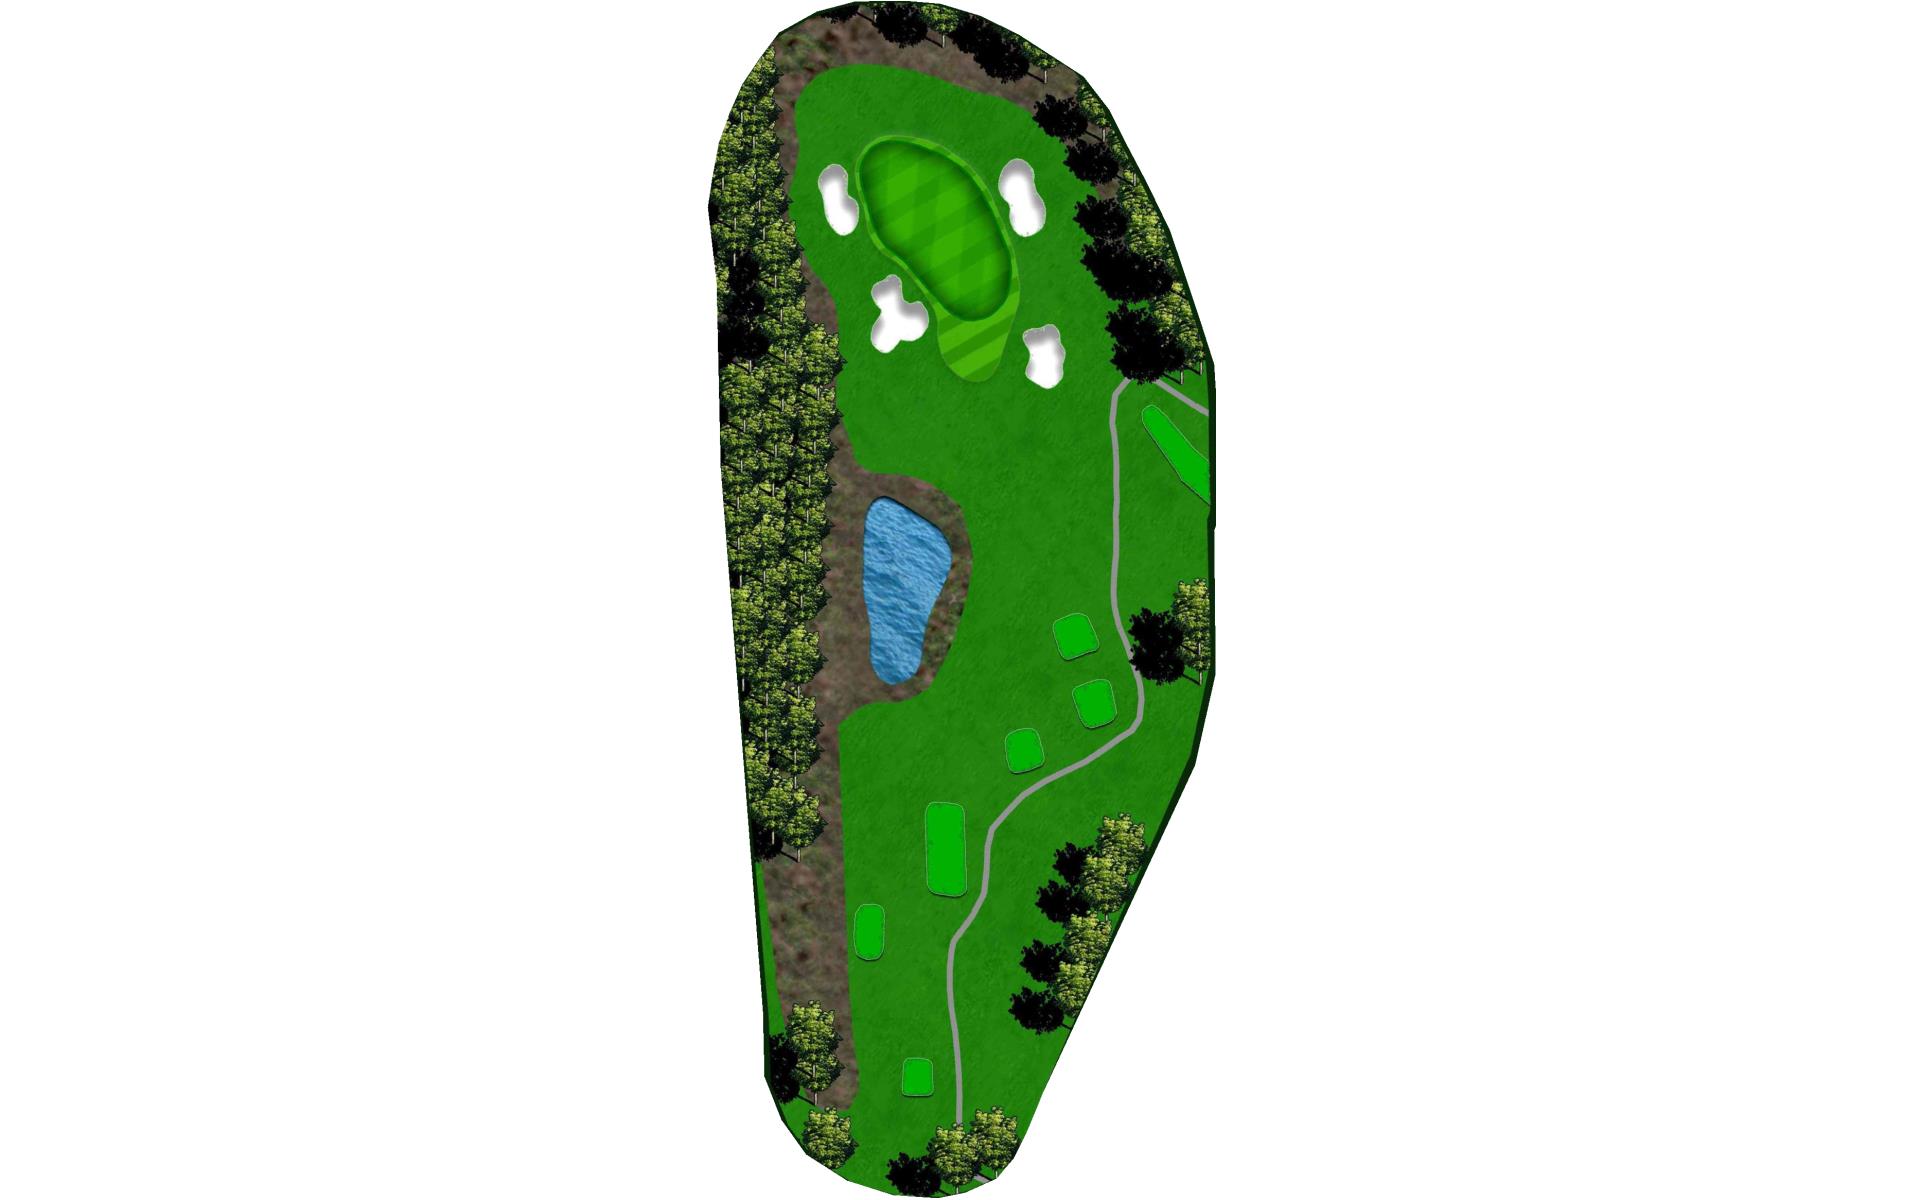
# 3 /
Par: 5
Handicaps:
Men's 7
Women's 5
Yardage by Tee:
WATSON 546
BLUE 507
WHITE 491
YELLOW 418
GREEN 393
Slope:
White 134
Pro Tips
The first par 5 on the golf course provides a good opportunity at birdie. As players approach the putting surface, they must be sure to avoid going long of the green.
# 4 /
Par: 3
Handicaps:
Men's 13
Women's 15
Yardage by Tee:
WATSON 205
BLUE 193
WHITE 178
GREEN 163
YELLOW 144
Slope:
Yellow 128
Pro Tips
This uphill par 3 features a green with a false front, so players need to take plenty of club.
# 5 /
Par: 4
Handicaps:
Men's 5
Women's 3
Yardage by Tee:
WATSON 478
BLUE 456
WHITE 426
YELLOW 410
GREEN 392
Pro Tips
The fifth is a long par 4 that plays downhill the whole way. A tee shot down the left side of the fairway will leave players a great angle to the green.
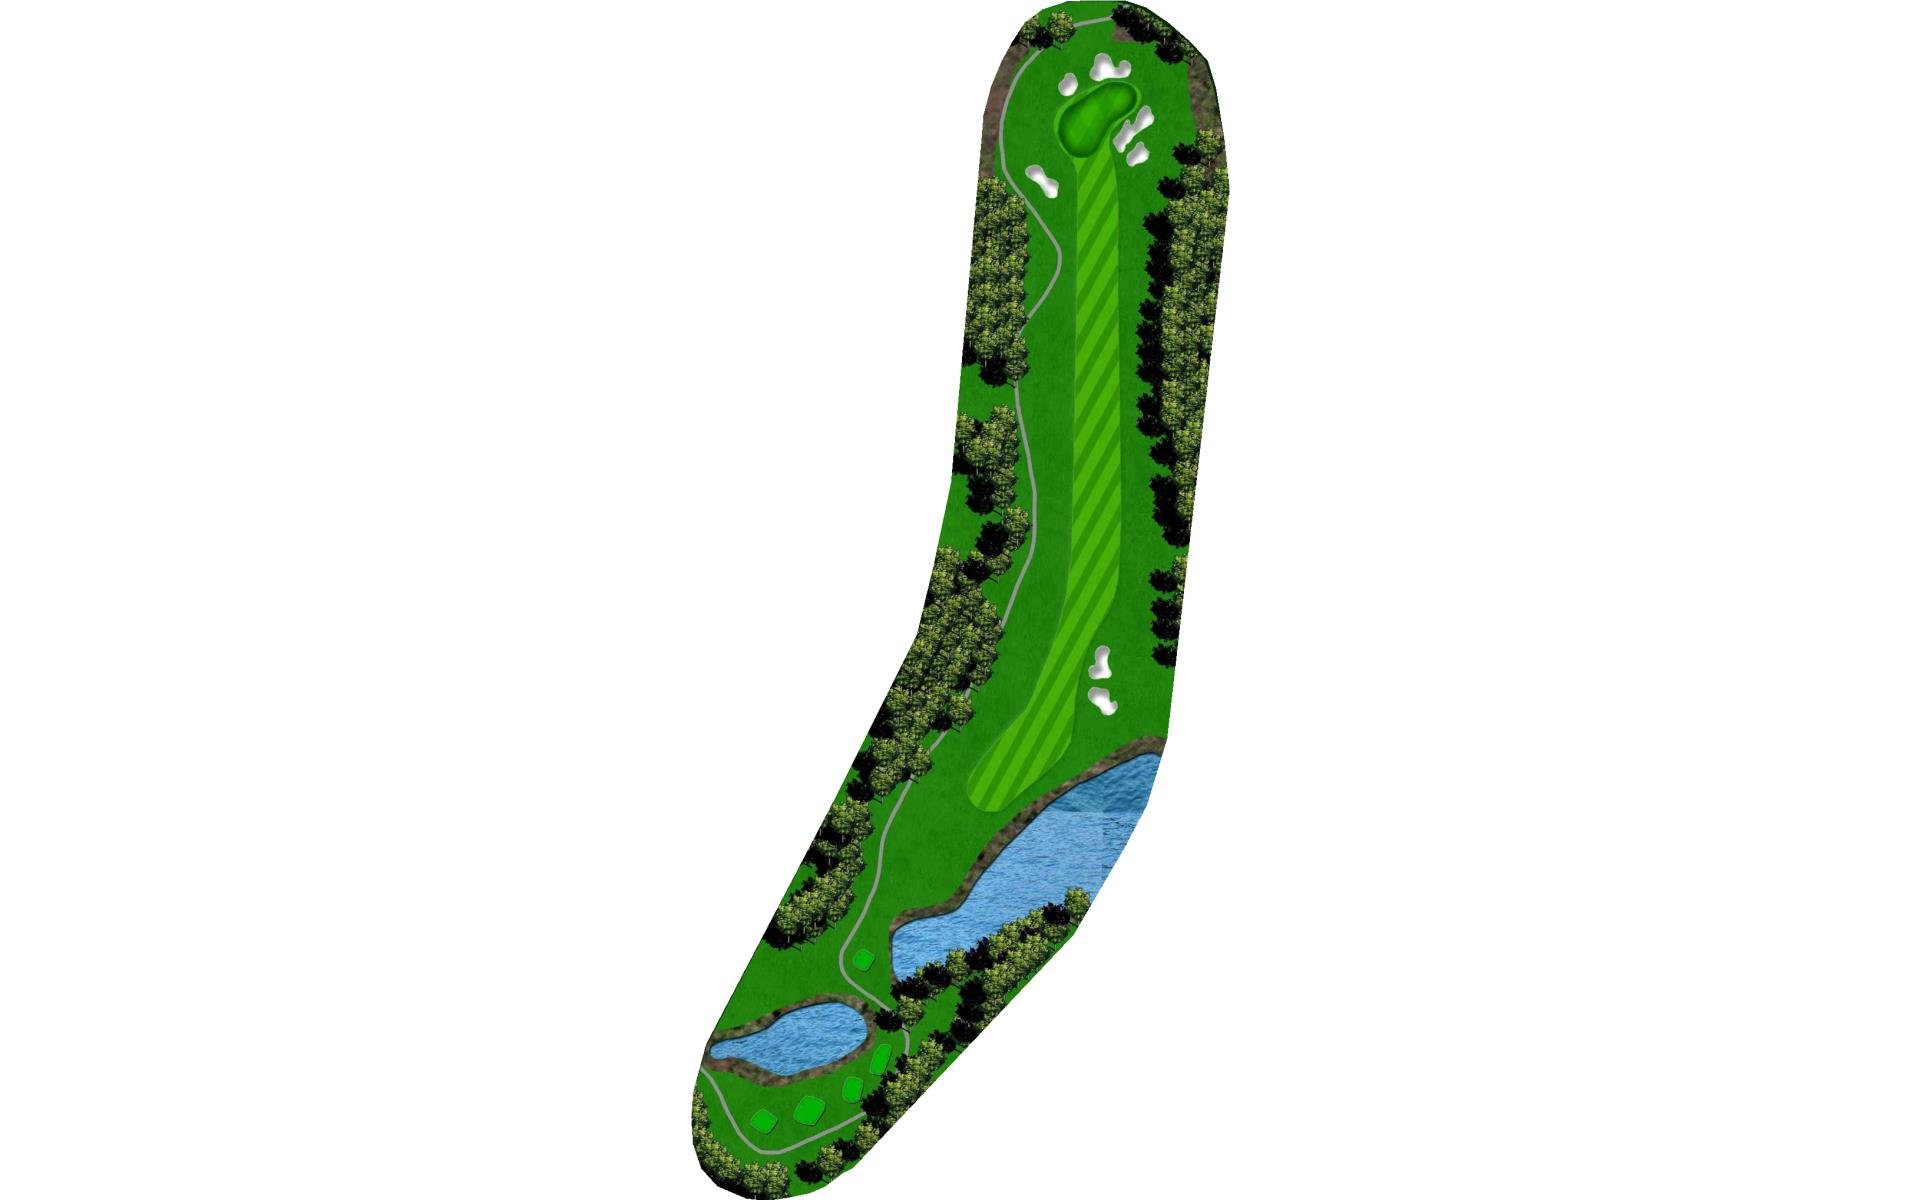
# 6 /
Par: 4
Handicaps:
Men's 3
Women's 7
Yardage by Tee:
WATSON 430
BLUE 414
WHITE 385
YELLOW 257
GREEN 293
Pro Tips
This par 4 is a tough one. Players will need to avoid the water on the left, in order to set up a straight shot into a complicated green, where hitting the right level is key.
# 7 /
Par: 3
Handicaps:
Men's 17
Women's 17
Yardage by Tee:
WATSON 214
BLUE 158
WHITE 150
YELLOW 124
GREEN 108
Pro Tips
On this par 3, players will benefit from hitting the correct side of this highly contoured green.
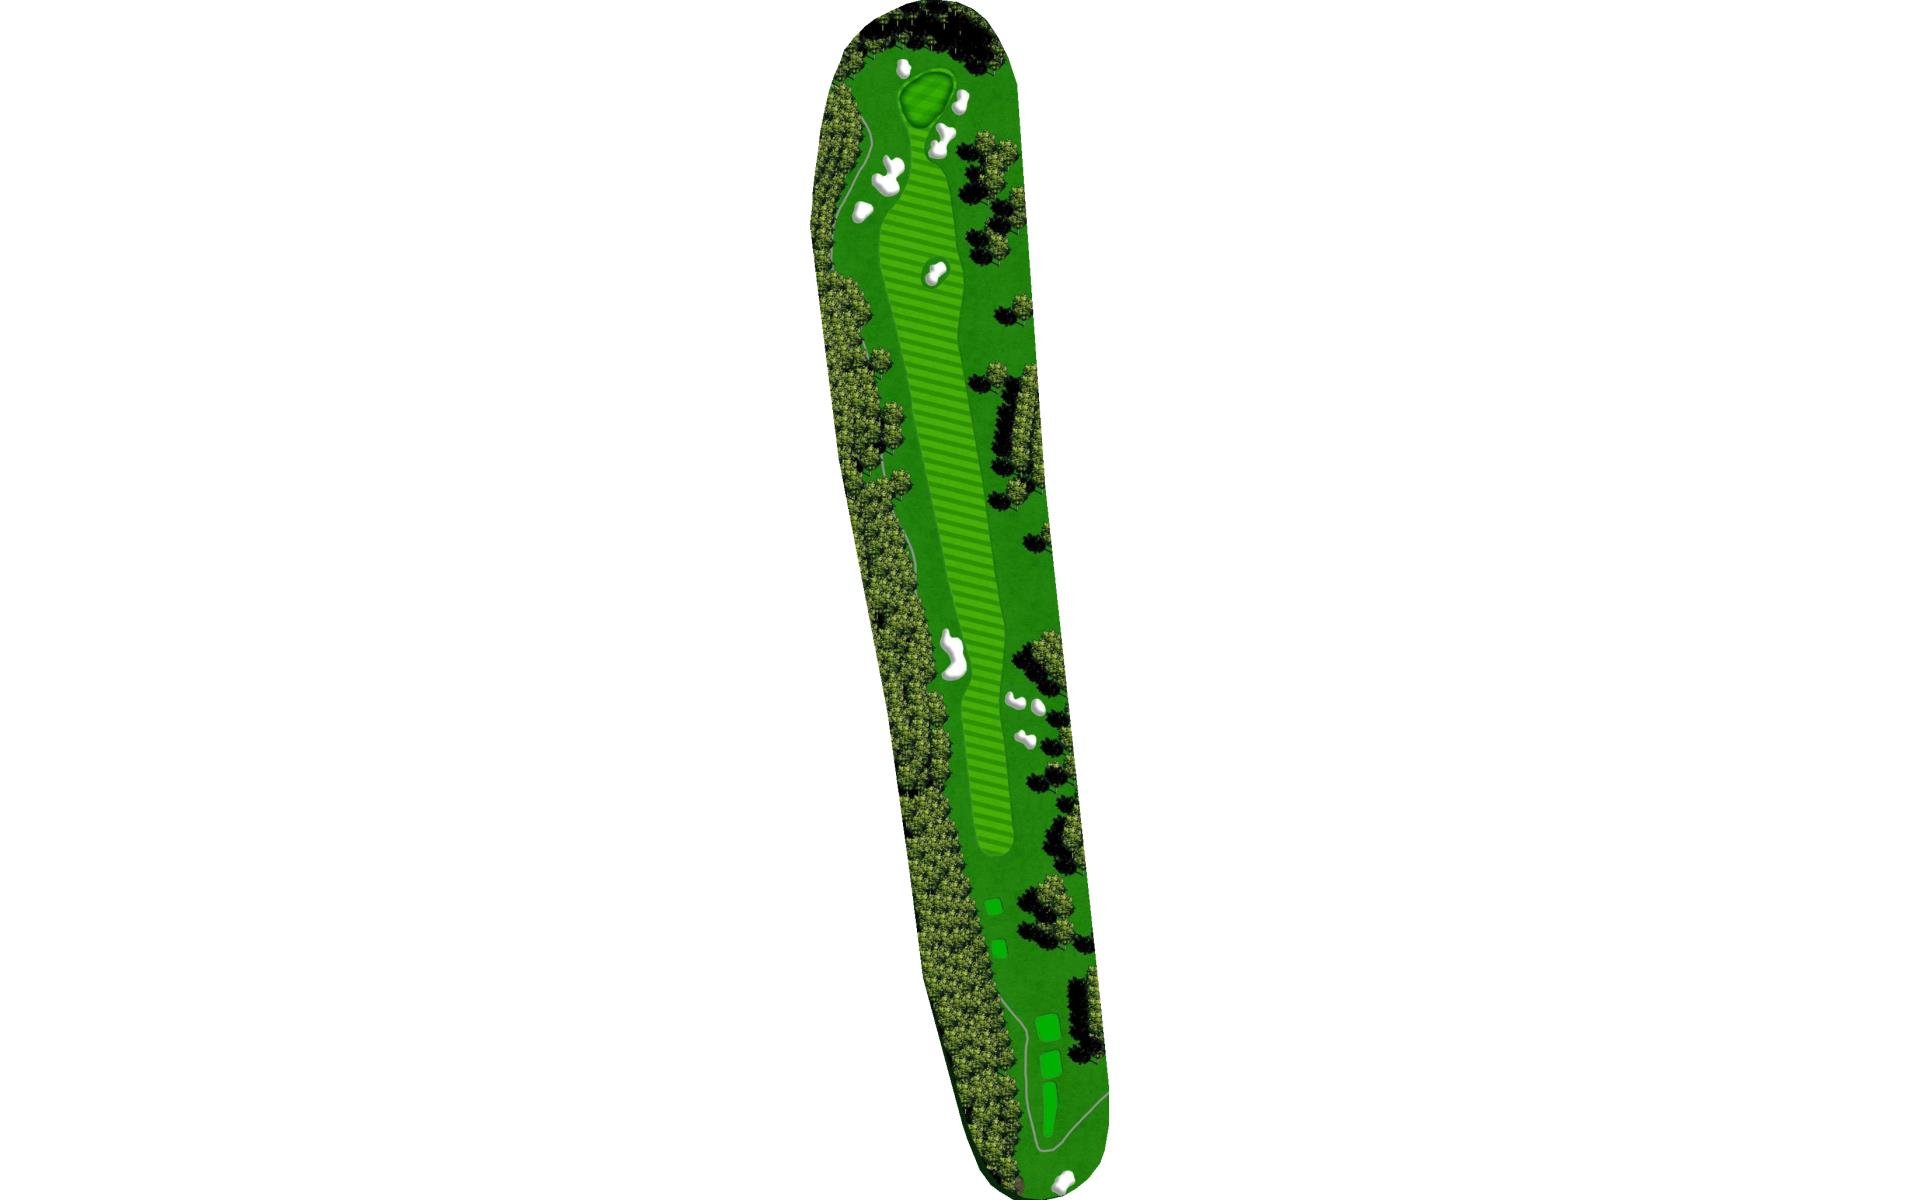
# 8 /
Par: 5
Handicaps:
Men's 1
Women's 1
Yardage by Tee:
WATSON 583
BLUE 551
WHITE 523
YELLOW 481
GREEN 456
Pro Tips
he eight is a par 5 that plays uphill the entire way. Players need to hit three well-placed shots to take advantage of this hole.

# 9 /
Par: 4
Handicaps:
Men's 15
Women's 13
Yardage by Tee:
WATSON 431
BLUE 414
WHITE 383
YELLOW 356
GREEN 332
Pro Tips
he final hole of the front nine is a par 4 where tee shots down the right side of the fairway will set up the best angle into the green.
# 10 /
Par: 4
Handicaps:
Men's 12
Women's 14
Yardage by Tee:
WATSON 372
BLUE 360
WHITE 349
YELLOW 339
GREEN 227
Pro Tips
The back nine opens with a nice little par 4. Drives need to avoid the fairway bunkers to leave players a short iron into the green.

# 11 /
Par: 4
Handicaps:
Men's 8
Women's 6
Yardage by Tee:
WATSON 406
BLUE 399
WHITE 376
YELLOW 363
GREEN 337
Pro Tips
The eleventh hole is a par 4 that features a blind tee shot up the hill. If players can trust their instincts, they’ll have a short club into the green.
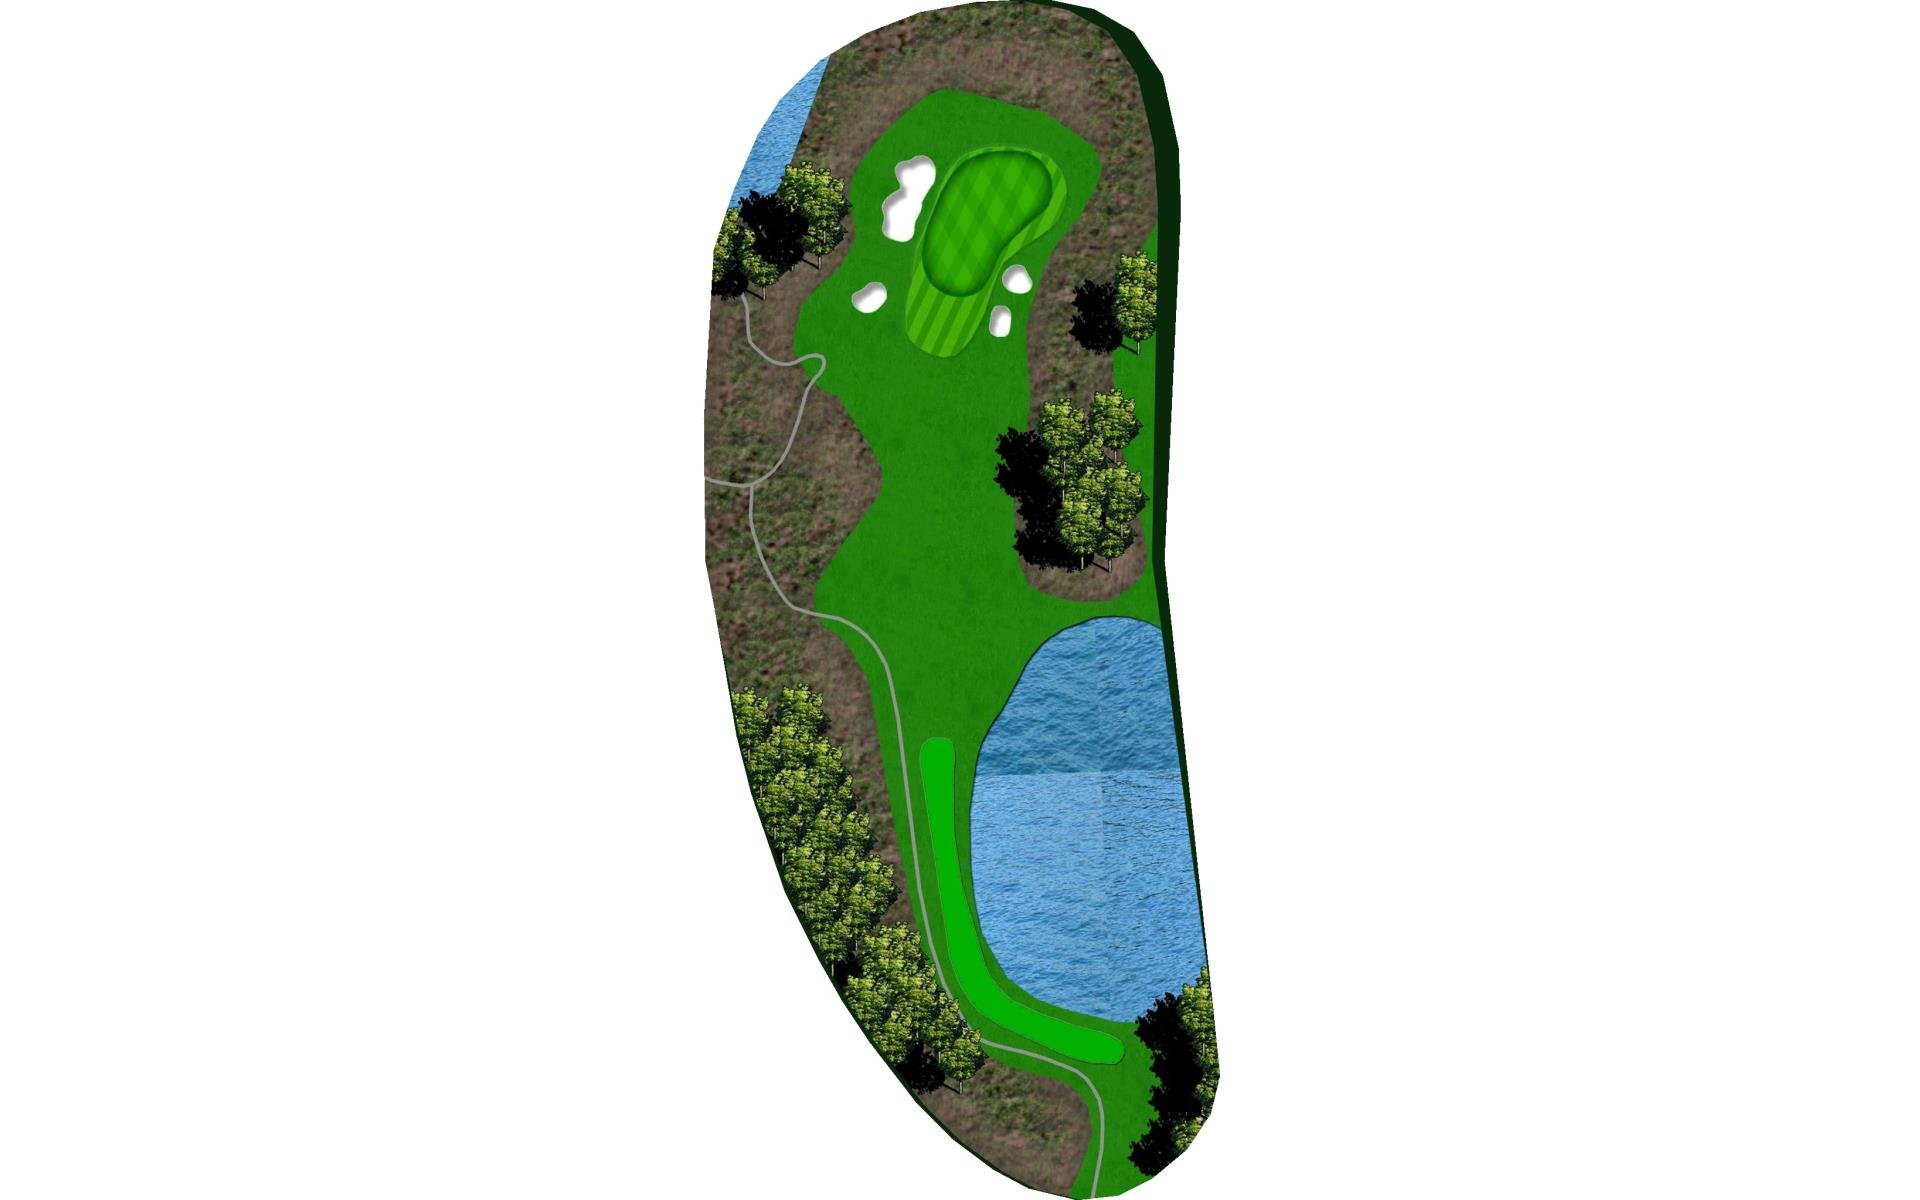
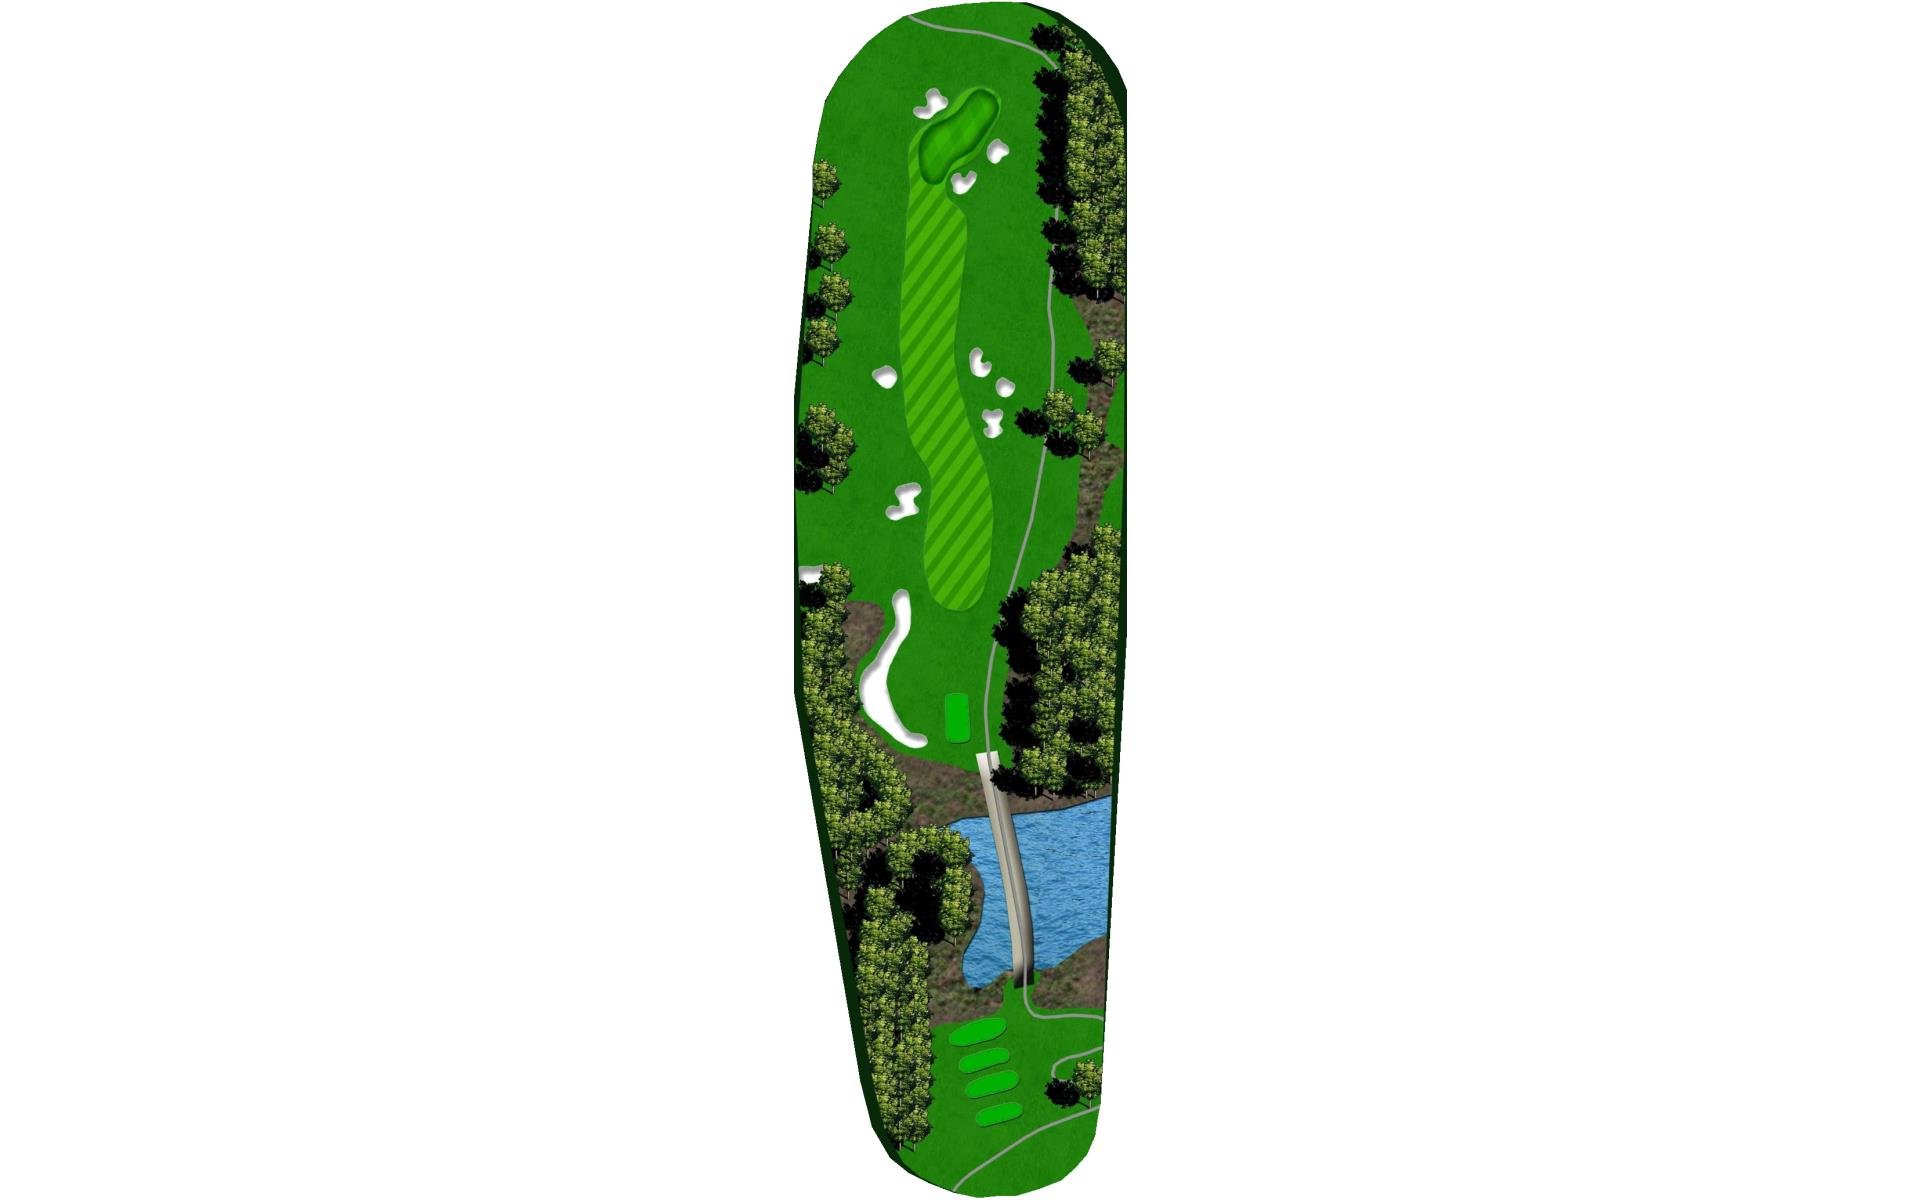
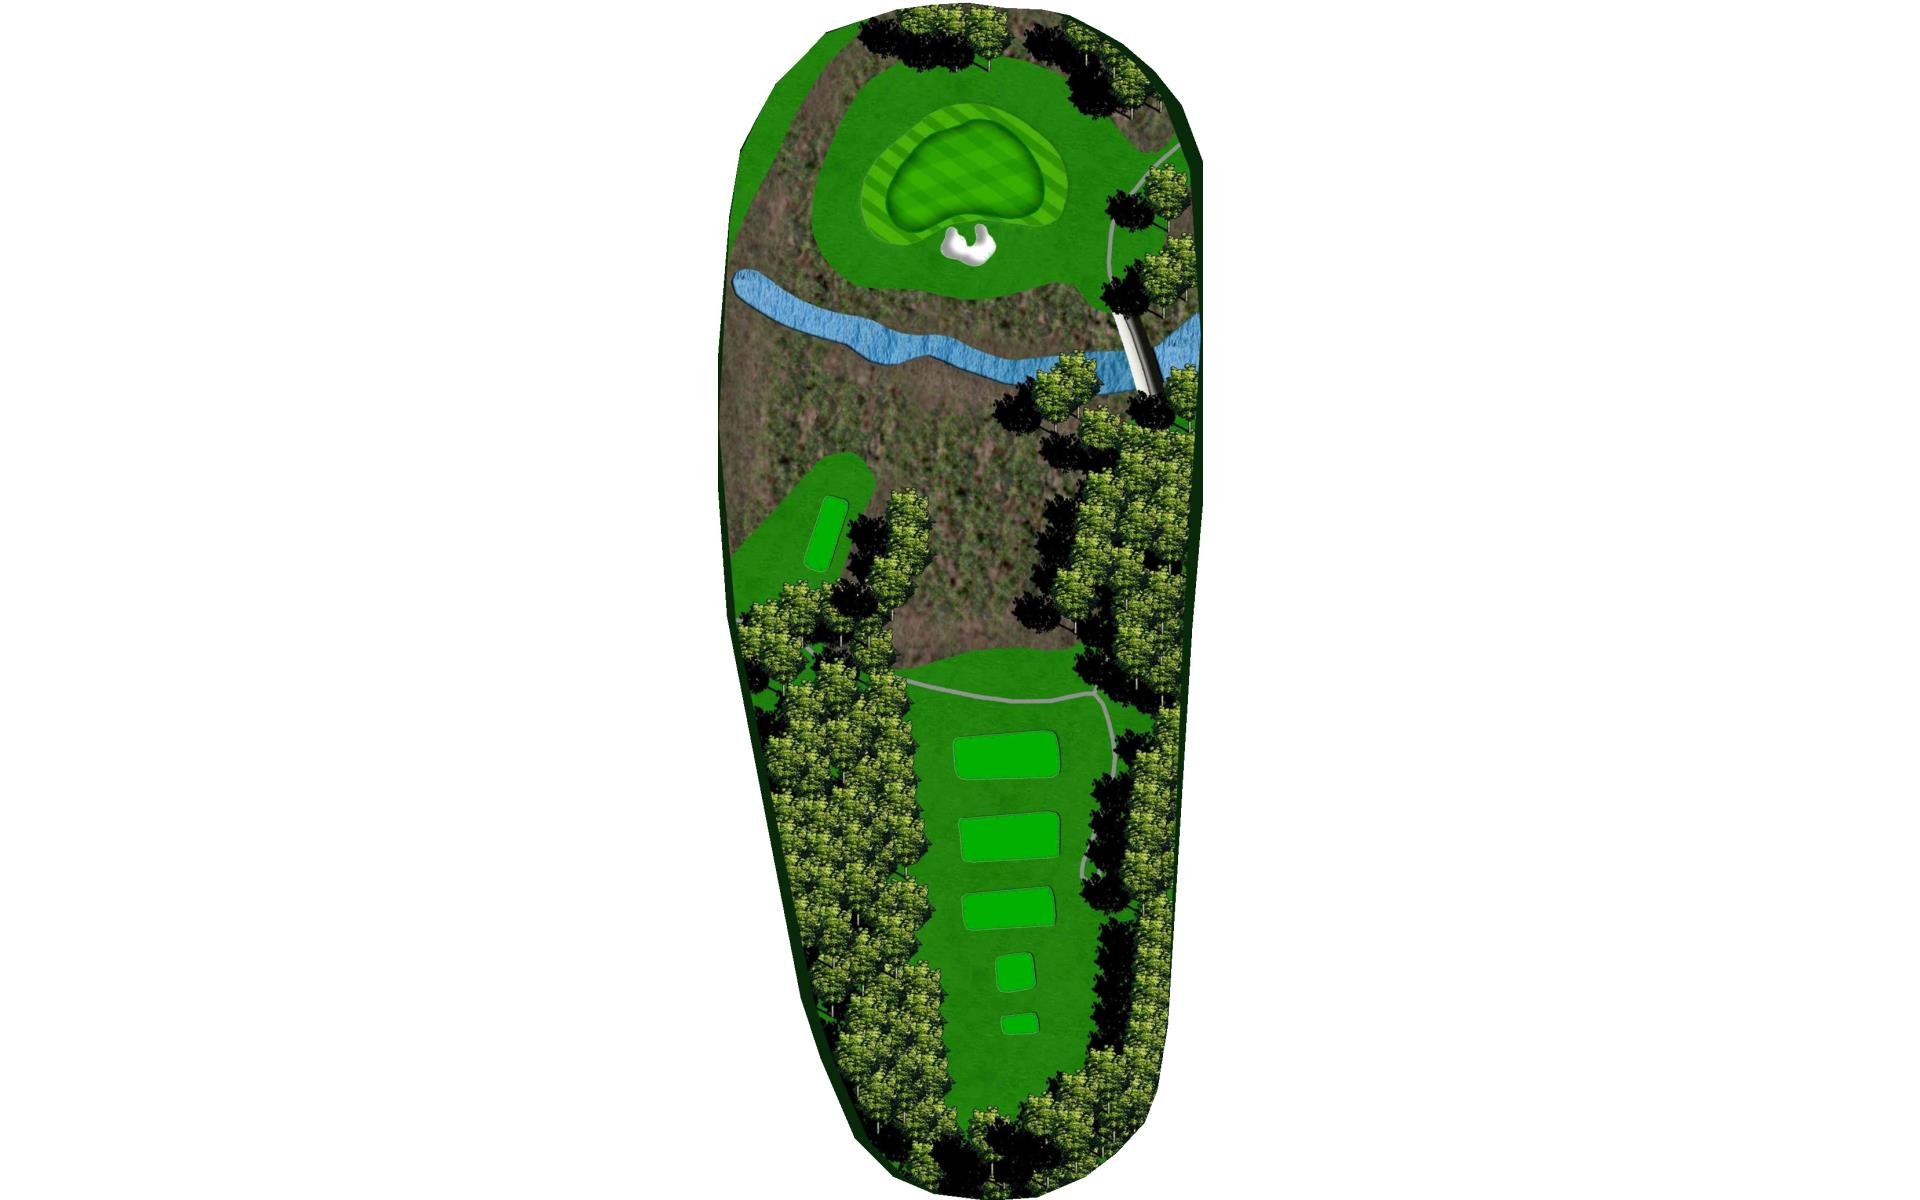
# 12 /
Par: 3
Handicaps:
Men's 18
Women's 18
Yardage by Tee:
WATSON 204
BLUE 198
WHITE 176
YELLOW 161
GREEN 138
Pro Tips
On the par 3 twelfth, it’s important to hit the correct level of the green or players could face a long first putt.
# 13 /
Par: 5
Handicaps:
Men's 2
Women's 4
Yardage by Tee:
WATSON 516
BLUE 492
WHITE 474
YELLOW 457
GREEN 419
Pro Tips
This short par 5 features bunkers that can easily attract a golf ball, whether it’s laying-up or going for the green in two.
# 14 /
Par: 4
Handicaps:
Men's 10
Women's 10
Yardage by Tee:
WATSON 398
BLUE 370
WHITE 353
YELLOW 331
GREEN 304
Pro Tips
Players will want to hit the fairway on this par 4 if they hope to make a birdie.

# 15 /
Par: 4
Handicaps:
Men's 2
Women's 8
Yardage by Tee:
WATSON 425
BLUE 399
WHITE 373
YELLOW 346
GREEN 319
Pro Tips
The par 4 fifteenth features fairway bunkers that should be avoided at all costs. As players approach the putting surface, they’ll also have to take the false front into consideration as they make their club selection.
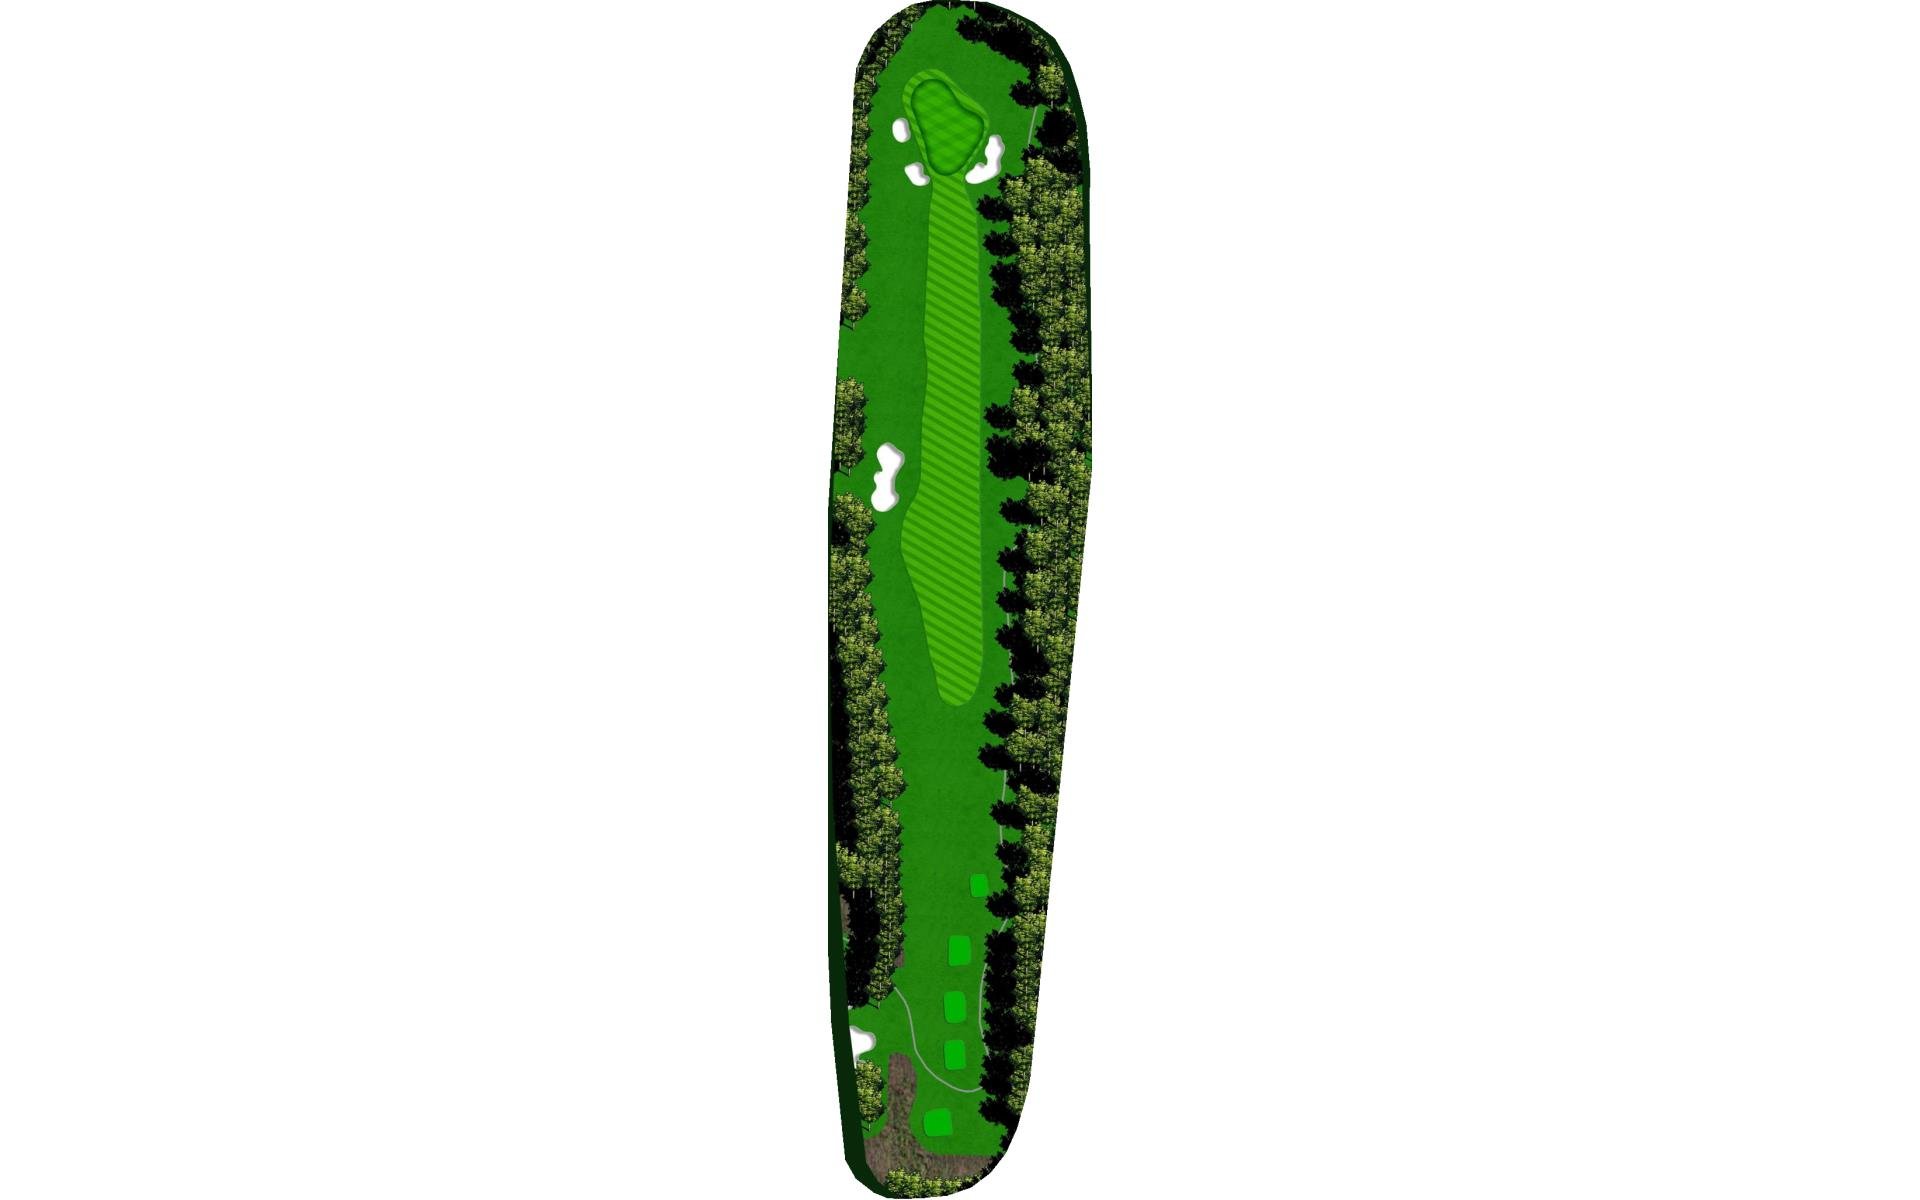
# 16 /
Par: 3
Handicaps:
Men's 16
Women's 16
Yardage by Tee:
WATSON 240
BLUE 203
WHITE 185
YELLOW 110
GREEN 96
Pro Tips
Players will want to avoid missing short on this demanding final par 3.
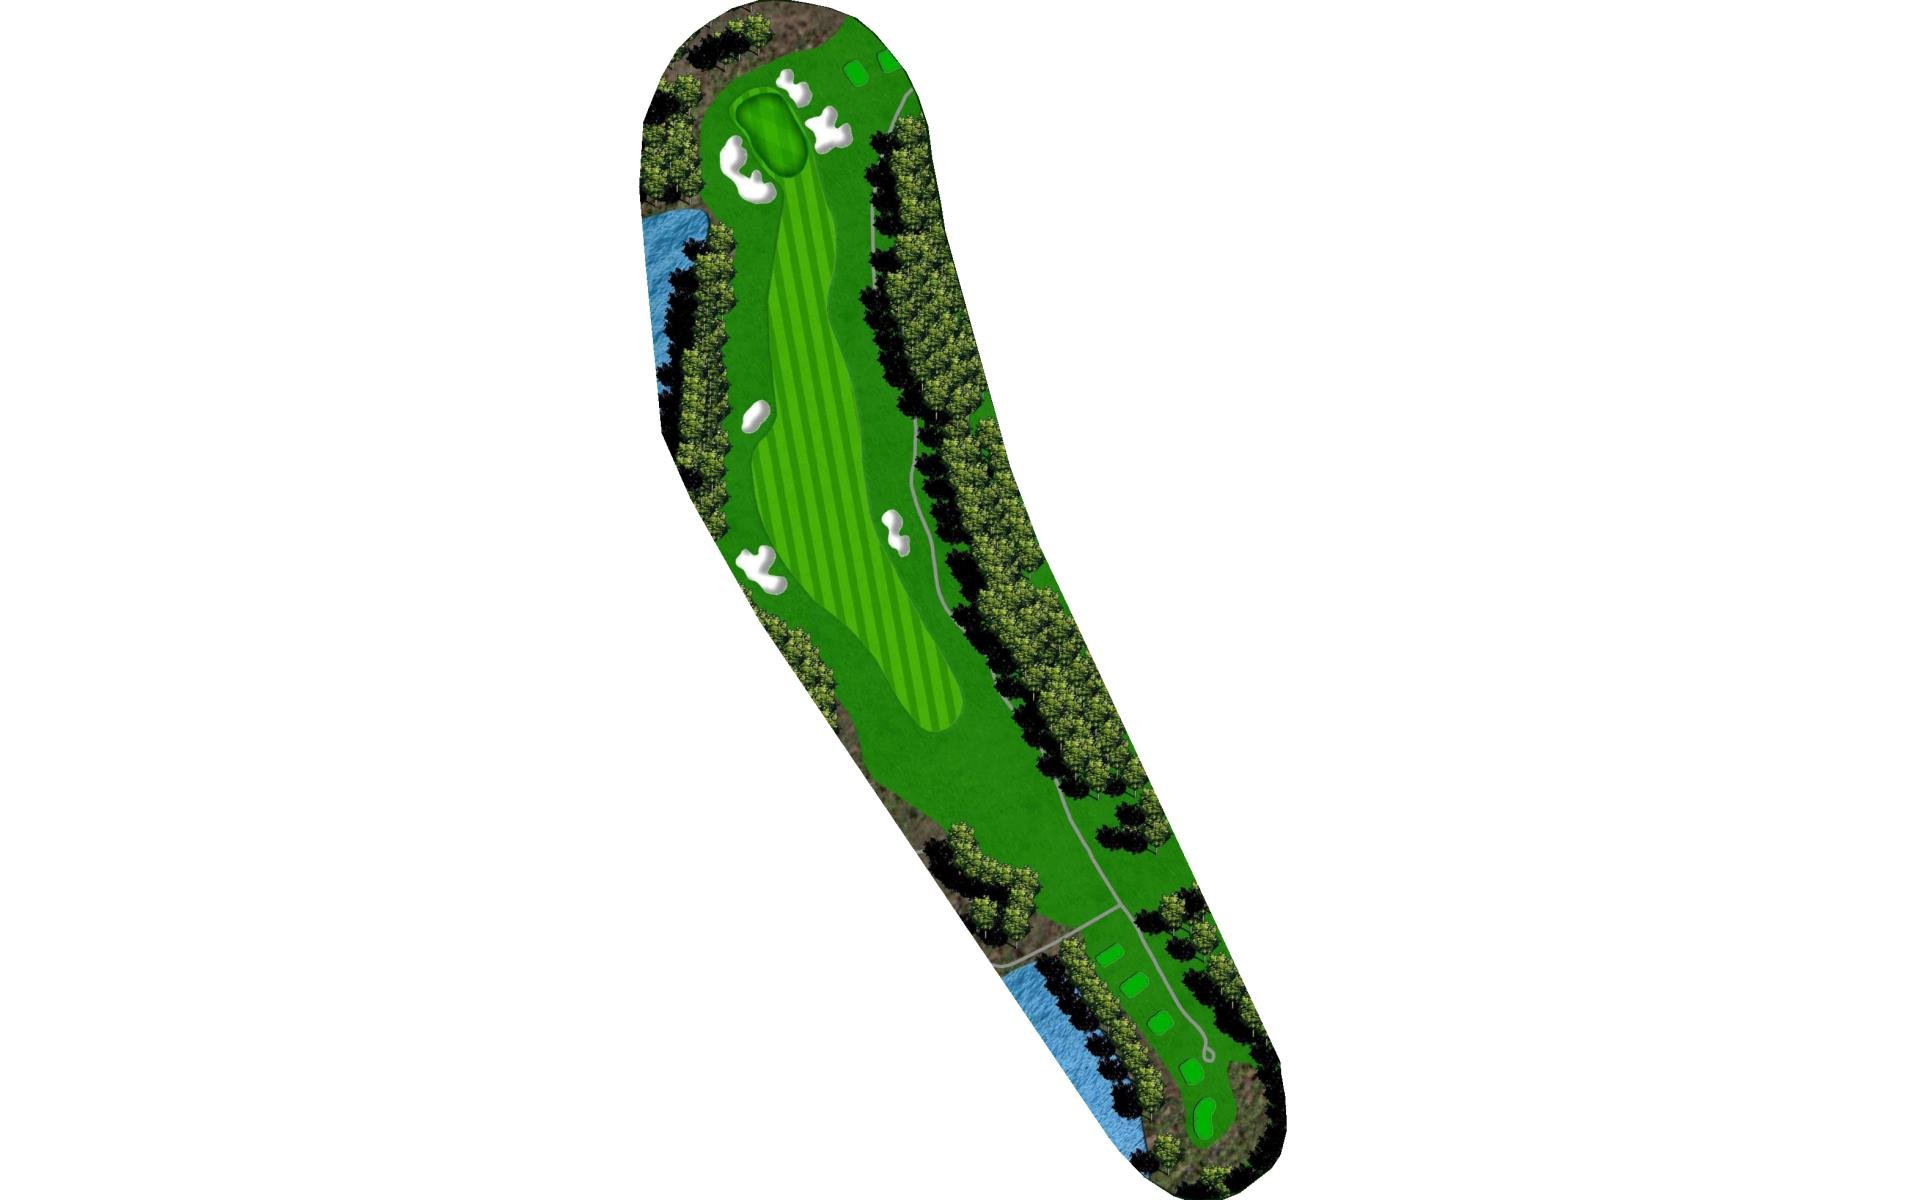
# 17 /
Par: 4
Handicaps:
Men's 14
Women's 12
Yardage by Tee:
WATSON 369
BLUE 337
WHITE 317
YELLOW 303
GREEN 278
Pro Tips
The tee shot on this par 4 features more room to the right than is visible. Then, on the approach shot, the green’s contours can be used to help get the ball close to the pin.
# 18 /
Par: 5
Handicaps:
Men's 6
Women's 4
Yardage by Tee:
WATSON 532
BLUE 511
WHITE 482
YELLOW 432
GREEN 410
Pro Tips
The final hole is a par 5 that is made easier by hitting a good tee shot. If players decide to go for the green in two, they’ll have to beware of the bunkers.