COURSE INFO

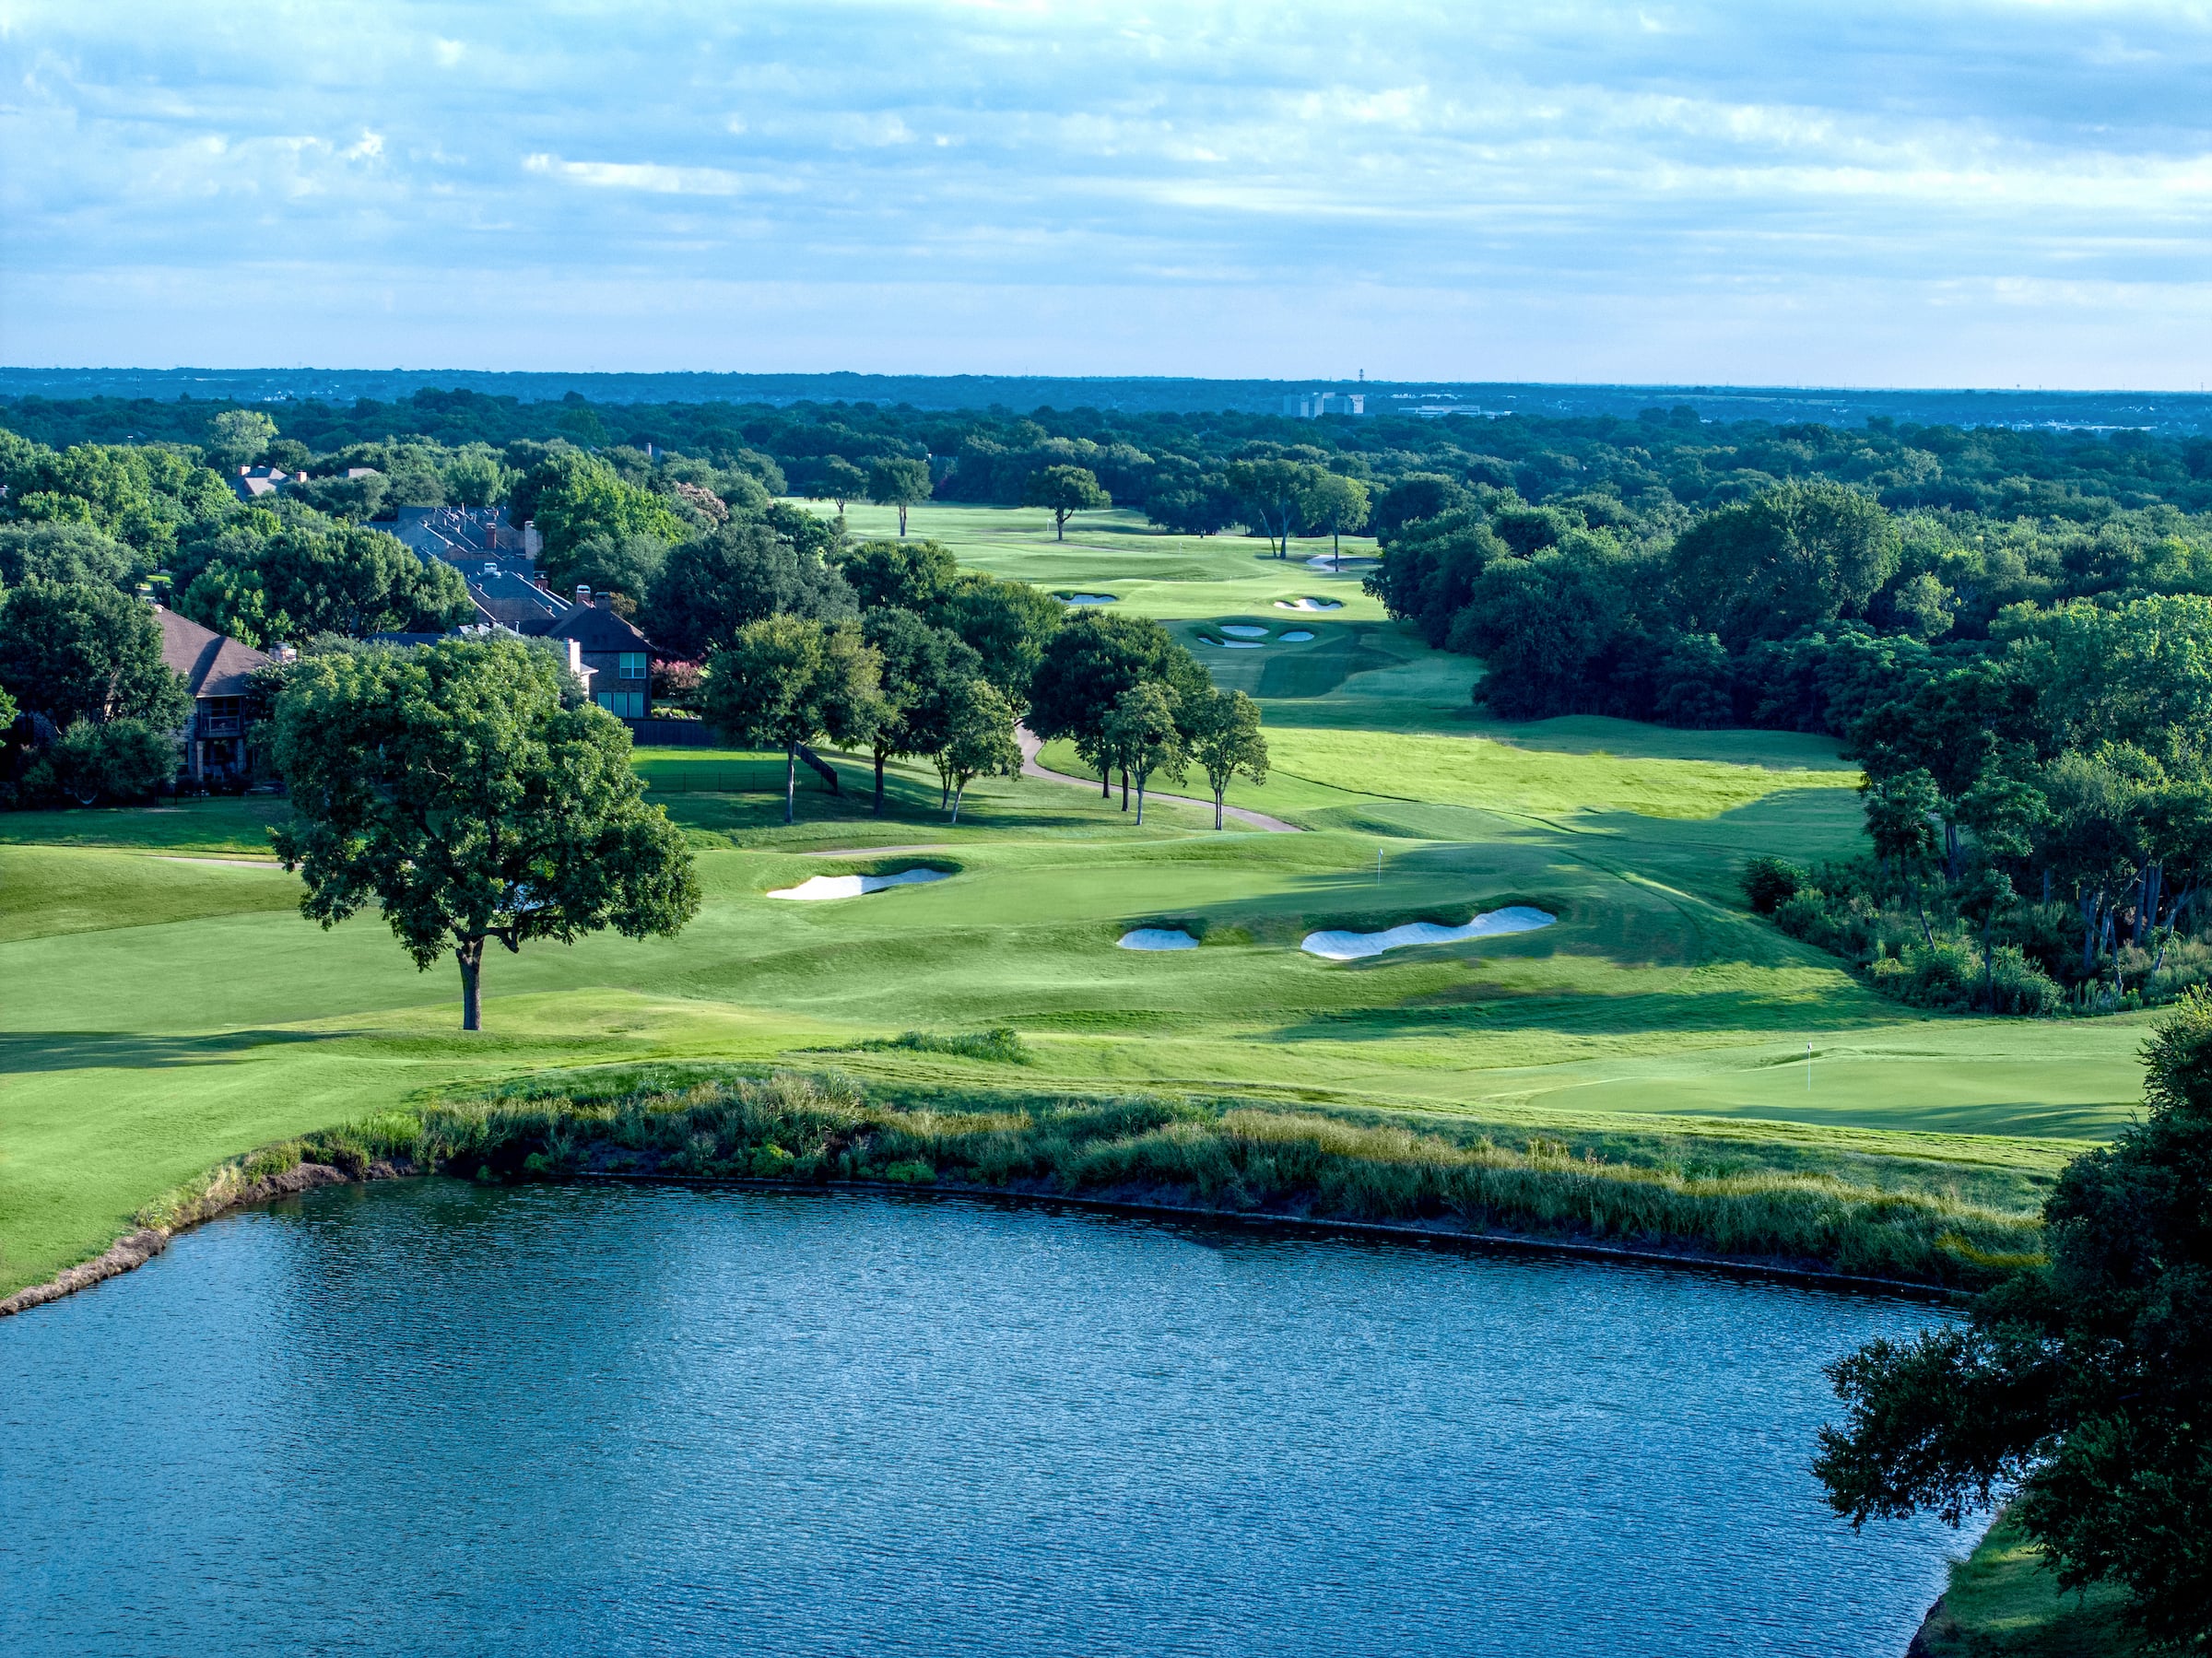
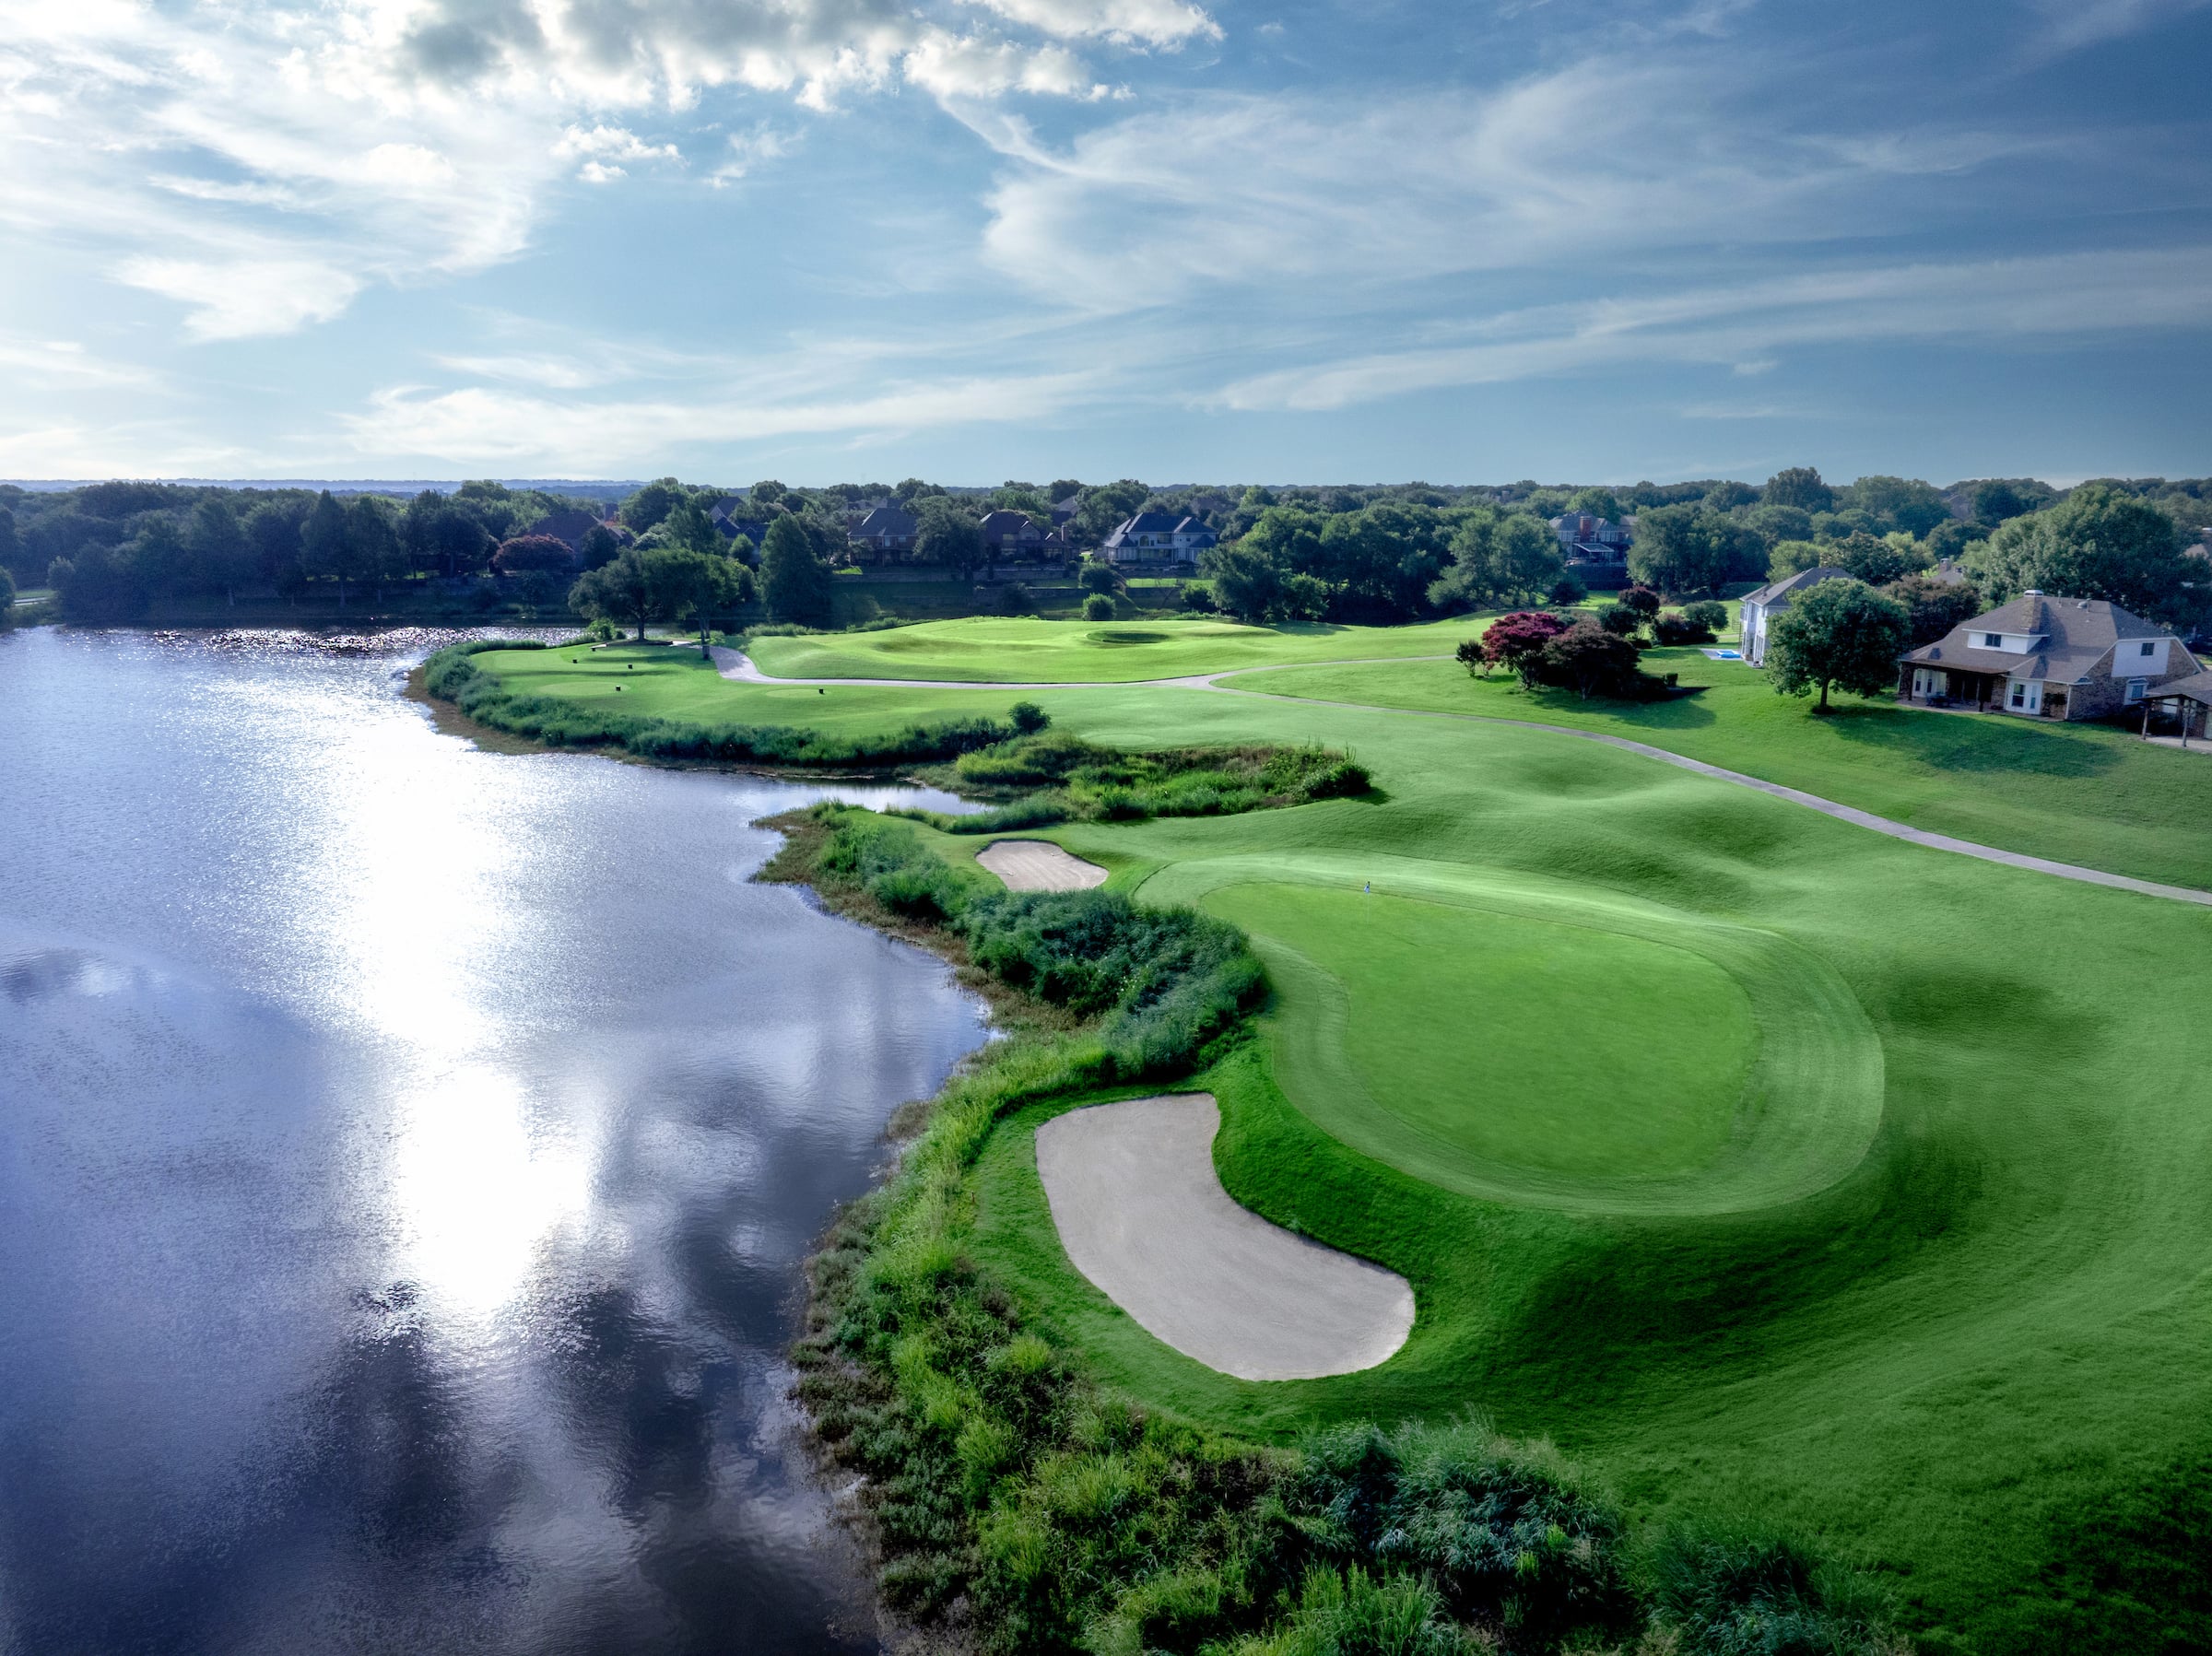
Designed by Arthur Hills and recently reimagined through a multimillion-dollar renovation led by Lanny Wadkins, the Hills Course features 27 holes of championship golf framed by scenic water features and lush fairways. New green complexes, bunkers, fairways, and infrastructure upgrades have elevated the playing experience while maintaining the course's appeal for both experienced and novice golfers.

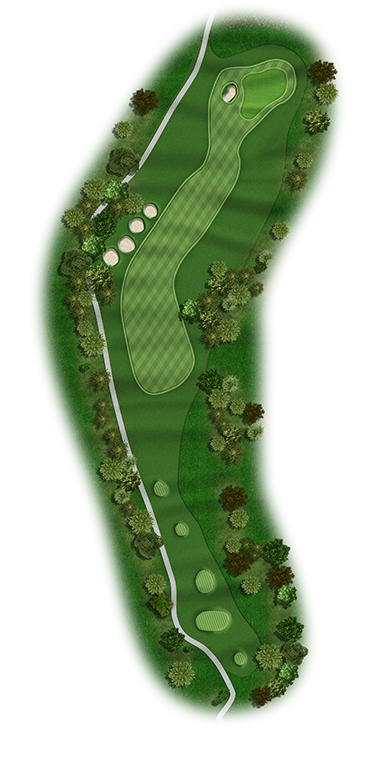
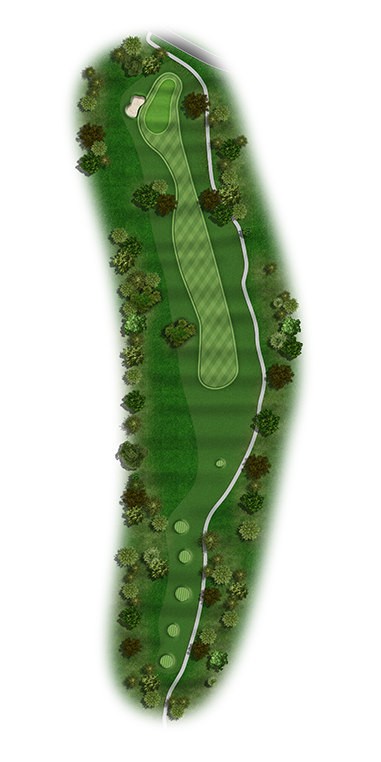
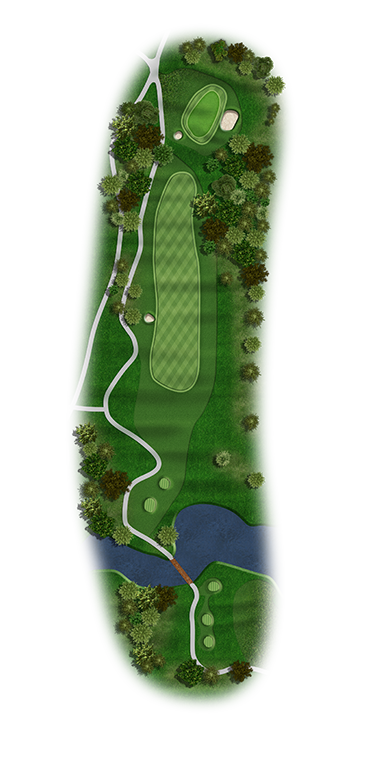
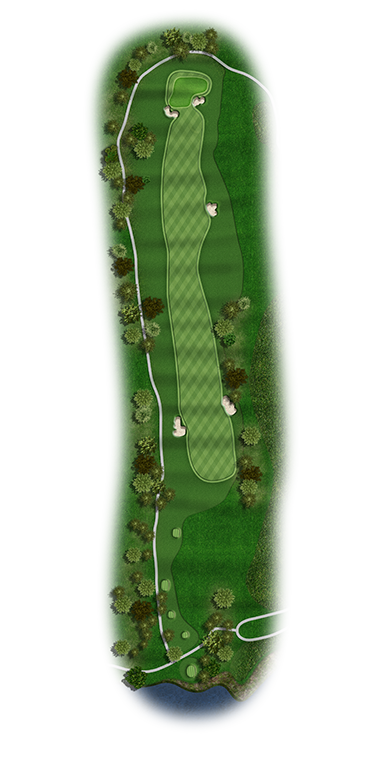
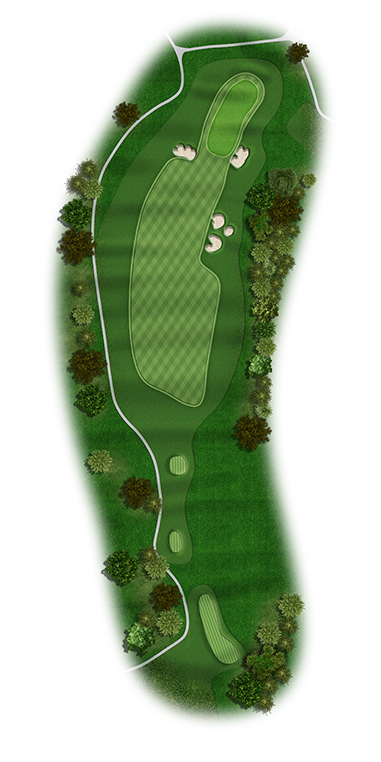
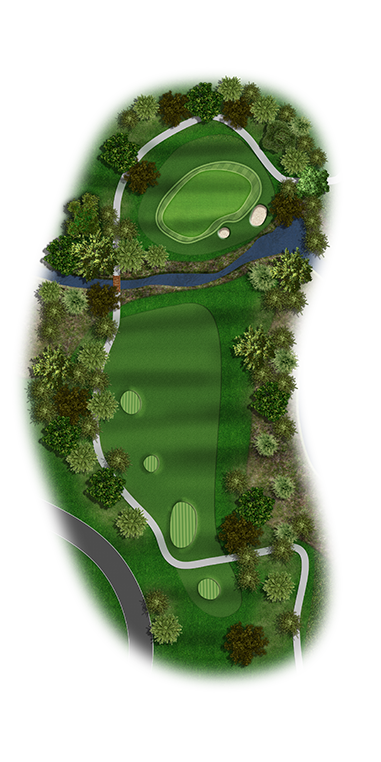
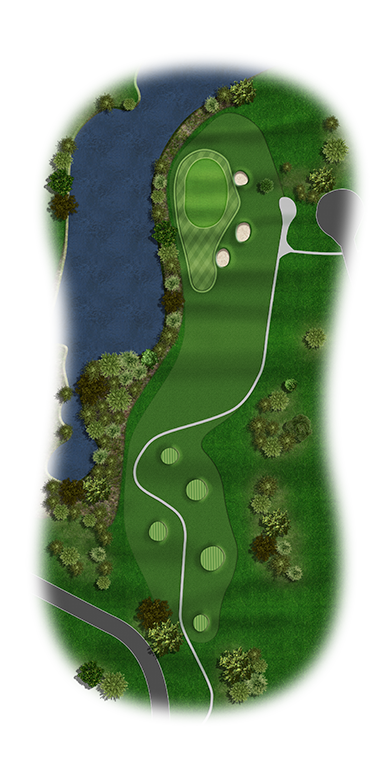
1st Hole

Par 4 · 410

Pro’s Tip:
The Hills starts with a classic dog leg right Par 4. The fairway is well guarded with bunkers down the left but a good tee ball leaves you with a short iron or wedge to a beautiful multi-level green.

Tee 1: 410

Tee 2: 382

Tee 3: 357

Tee 4: 318

Tee 5: 289

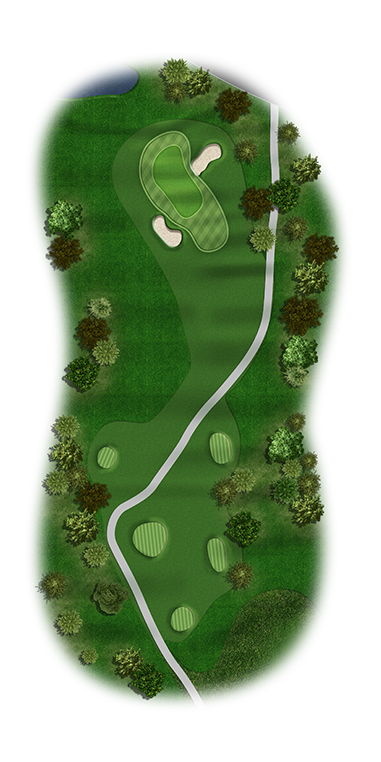
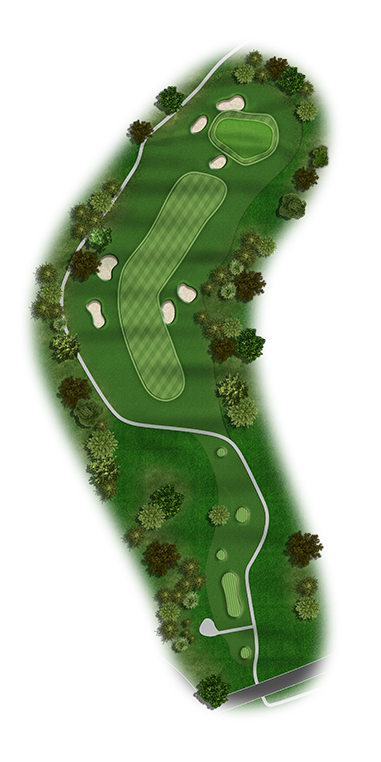
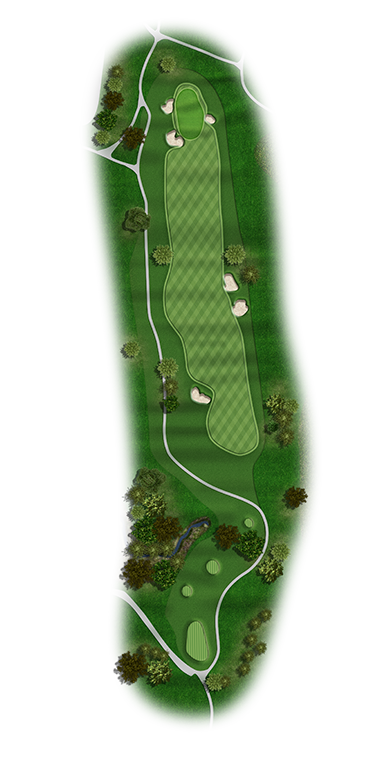
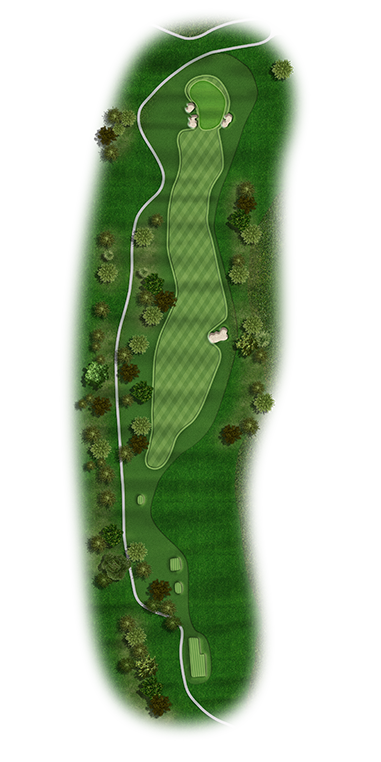
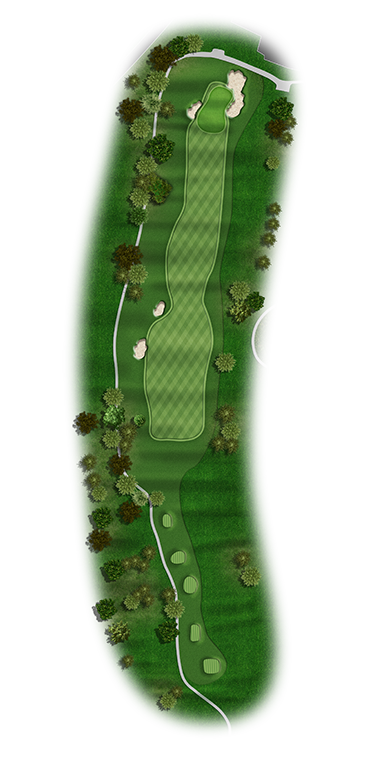
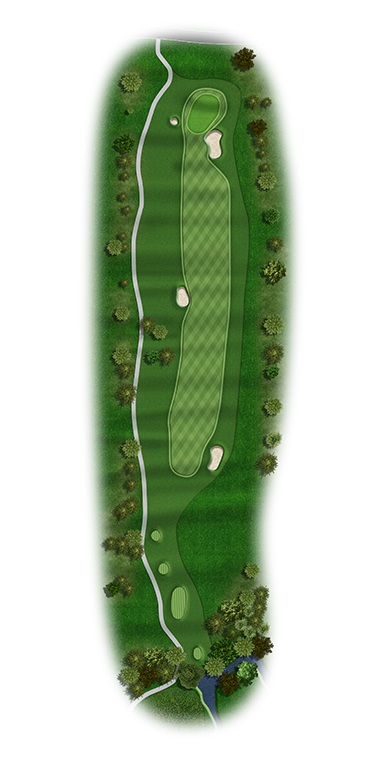
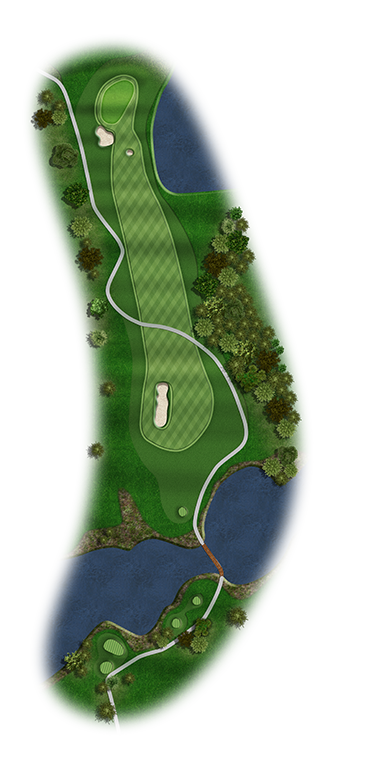
2nd Hole

Par 3 · 211

Pro’s Tip:
Accuracy is a premium on this mid length Par 3 with deep bunkers left and right of the green.

Tee 1: 211

Tee 2: 181

Tee 3: 173

Tee 4: 141

Tee 5: 133

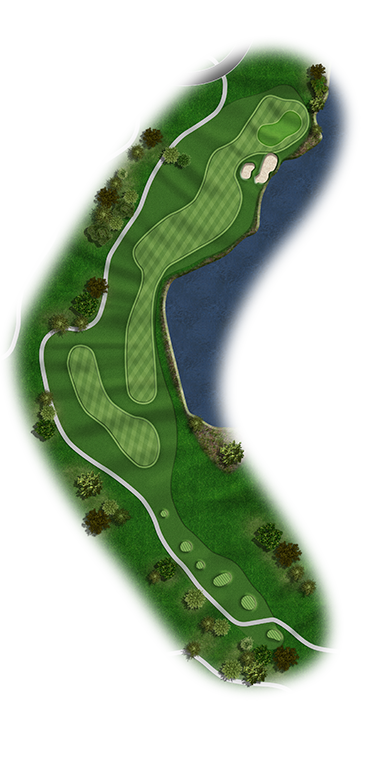
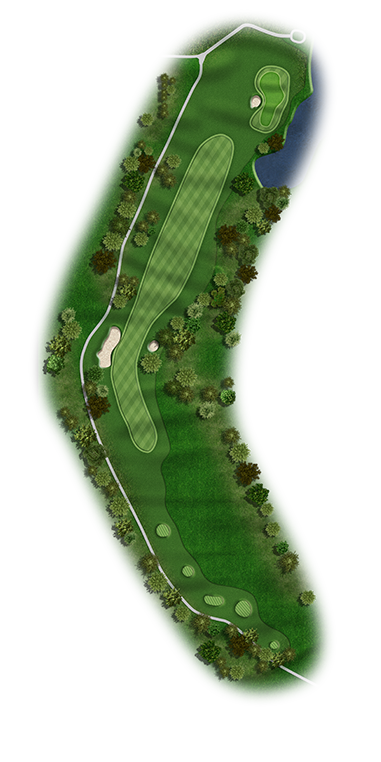
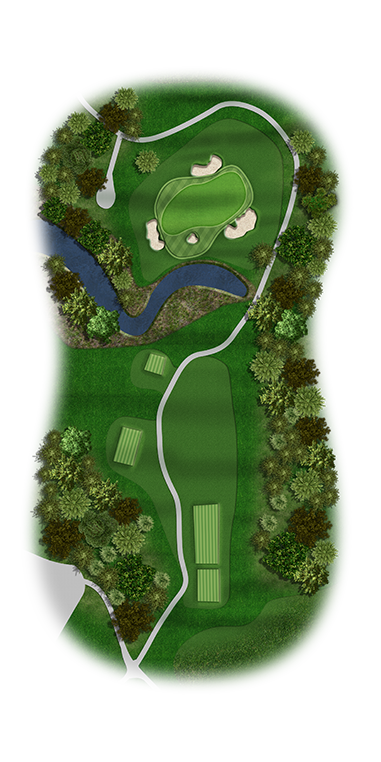
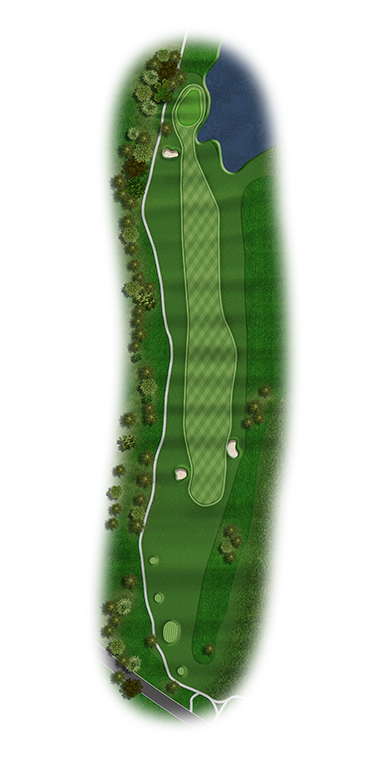
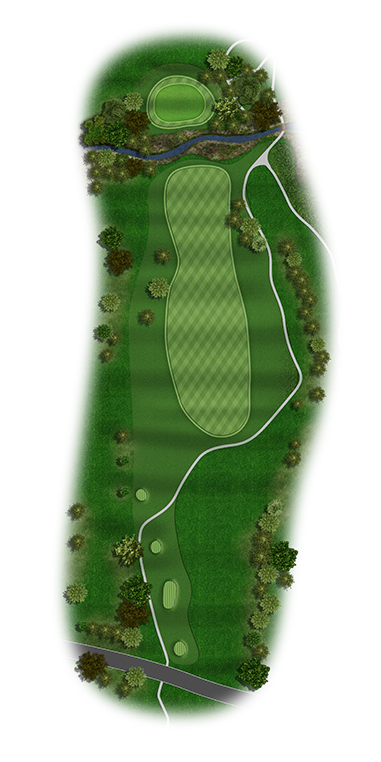
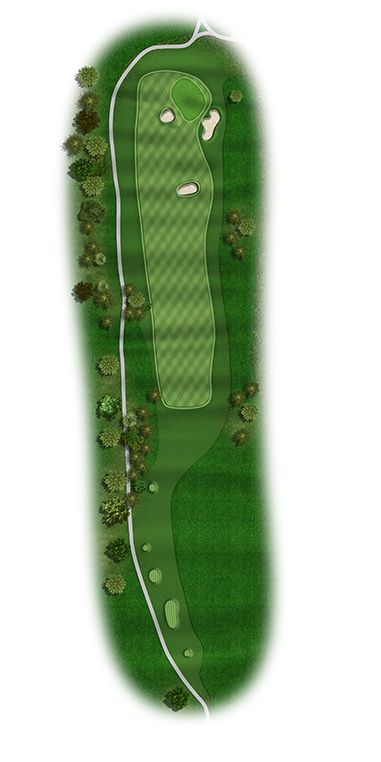
3rd Hole

Par 5 · 510

Pro’s Tip:
Are you feeling lucky? An aggressive tee ball down the right side allows you to get home in two on this mid length Par 5. A tee ball down the left and you still have a birdie chance on a classic 3 shot Par 5.

Tee 1: 510

Tee 2: 495

Tee 3: 471

Tee 4: 429

Tee 5: 412

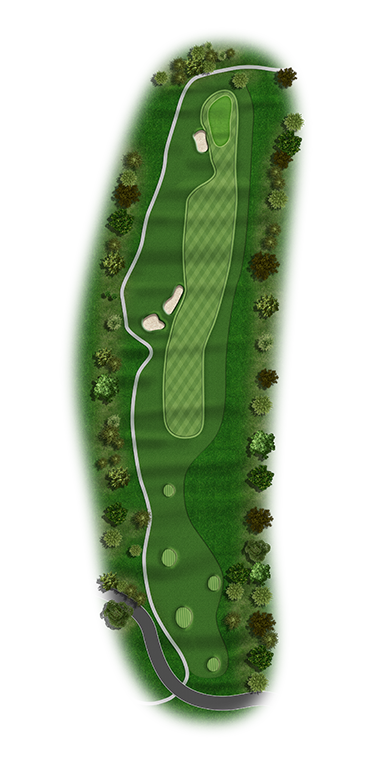
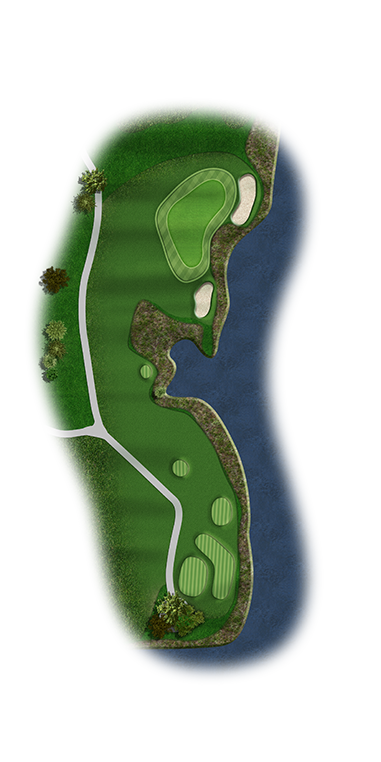
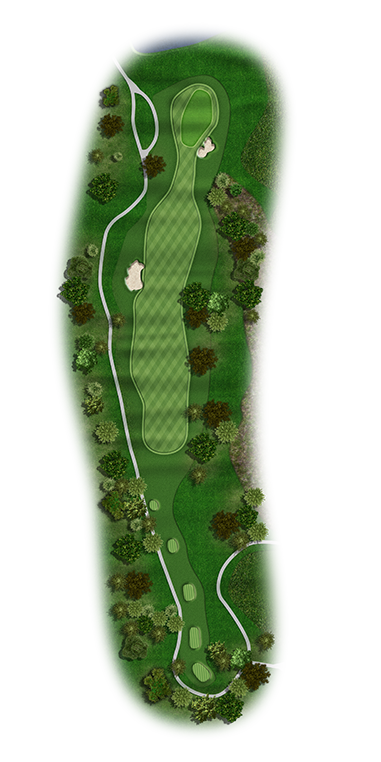
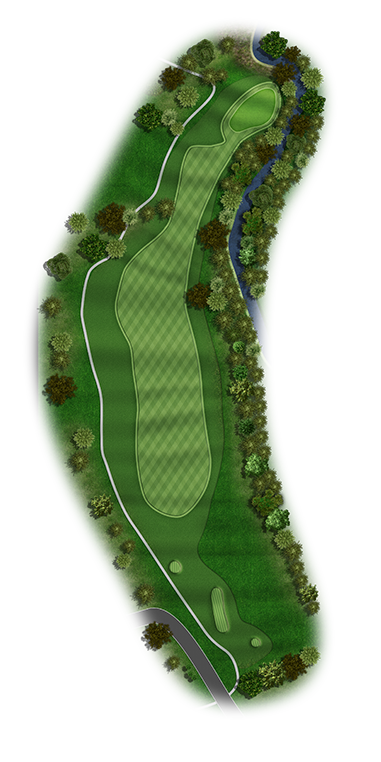
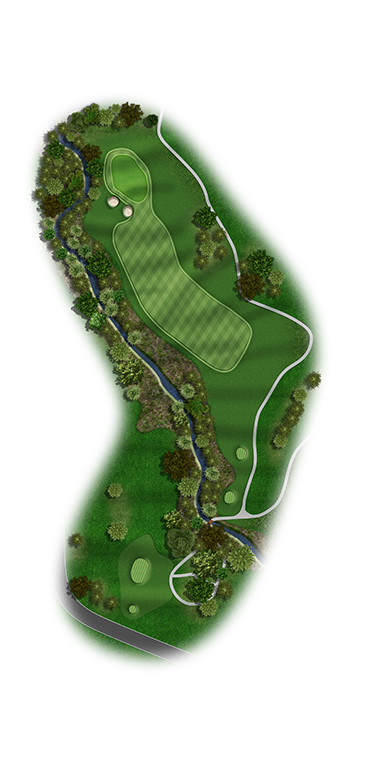
4th Hole

Par 4 · 429

Pro’s Tip:
Favor the right side on this straight away Par 4. Bunkers on the left side of the fairway and green are waiting for errant shots.

Tee 1: 429

Tee 2: 394

Tee 3: 365

Tee 4: 346

Tee 5: 294

5th Hole

Par 4 · 451

Pro’s Tip:
Can you turn it over? A slight draw is the play off the tee leaving you with a shot to a large green. Pick your club wisely on your second shot. Front to Back pin could be a 3 club difference.

Tee 1: 451

Tee 2: 420

Tee 3: 387

Tee 4: 362

Tee 5: 297

6th Hole

Par 4 · 388

Pro’s Tip:
This fairway is well guarded by four bunkers on both the left and right side. Take plenty of club on this uphill second shot as bunkers short of the green will catch anything short.

Tee 1: 388

Tee 2: 369

Tee 3: 340

Tee 4: 302

Tee 5: 256

7th Hole

Par 5 · 570

Pro’s Tip:
Big hitters can hit the tee ball down the right side and over the trees for a short second on this par 5. This green is tricky so make sure your third shot is from a yardage that you feel good about.

Tee 1: 570

Tee 2: 528

Tee 3: 509

Tee 4: 476

Tee 5: 432

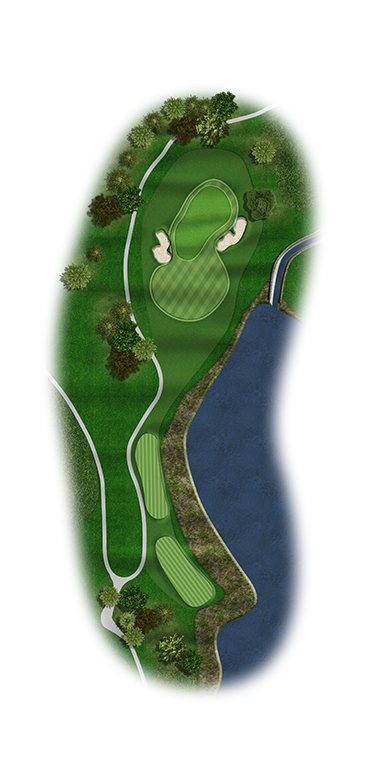
8th Hole

Par 3 · 168

Pro’s Tip:
Nowhere to hide on this short Par 3. Water and bunkers right and a deep dropoff to the left make this hole a must for accuracy.

Tee 1: 168

Tee 2: 160

Tee 3: 147

Tee 4: 130

Tee 5: 112

9th Hole

Par 4 · 441

Pro’s Tip:
Just stripe it down the middle on this classic Par 4. A short iron or wedge is left. Lets finish this side with a birdie!!!

Tee 1: 441

Tee 2: 423

Tee 3: 396

Tee 4: 328

Tee 5: 309

10th Hole

Par 4 · 398

Pro’s Tip:
Avoid the huge bunker down the right side of the fairway. Favor the right side of the green for your approach shot as the left side leads to big trouble.

Tee 1: 398

Tee 2: 383

Tee 3: 354

Tee 4: 333

Tee 5: 302

11th Hole

Par 3 · 175

Pro’s Tip:
Check the yardage for your tee shot on this shallow Par 3. Deep bunkers guard short of the green and over is a difficult up and down.

Tee 1: 175

Tee 2: 157

Tee 3: 145

Tee 4: 118

Tee 5: 77

12th Hole

Par 4 · 387

Pro’s Tip:
Hitting the fairway is a must on this short Par 4. A fairway metal or hybrid off the tee will set up a short second shot.

Tee 1: 387

Tee 2: 364

Tee 3: 332

Tee 4: 299

Tee 5: 270

13th Hole

Par 5 · 580

Pro’s Tip:
Avoid the deep bunker down the left side of the fairway with your tee ball. This is a long Par 5 for most. Hit your second shot to a yardage that will leave you with an easy third and a birdie opportunity.

Tee 1: 580

Tee 2: 543

Tee 3: 525

Tee 4: 494

Tee 5: 441

14th Hole

Par 4 · 452

Pro’s Tip:
Left center of the fairway avoids the deep bunker on the right. This green is large with not much trouble. Take dead aim.

Tee 1: 452

Tee 2: 438

Tee 3: 391

Tee 4: 371

Tee 5: 328

15th Hole

Par 3 · 188

Pro’s Tip:
Check the wind and yardage twice on this mid length Par 3. Middle to back pins can take half a club more.

Tee 1: 188

Tee 2: 172

Tee 3: 155

Tee 4: 132

Tee 5: 118

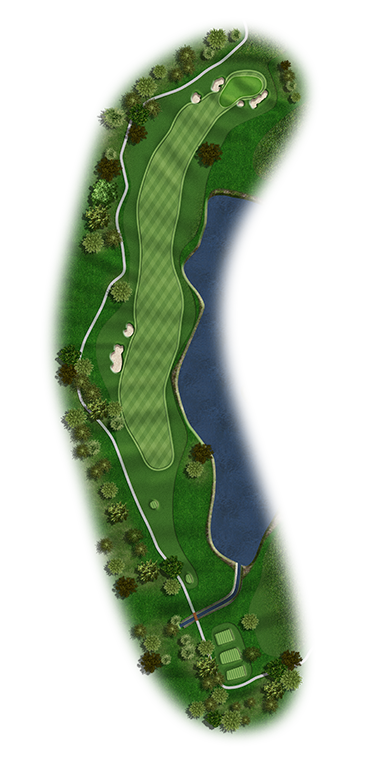
16th Hole

Par 5 · 543

Pro’s Tip:
Bunkers left and water right make an accurate tee ball a must on this beautiful Par 5. Avoid the big tree on the right side of the fairway on your second shot leaving you an easy wedge and birdie.

Tee 1: 543

Tee 2: 527

Tee 3: 510

Tee 4: 453

Tee 5: 384

17th Hole

Par 4 · 312

Pro’s Tip:
A classic risk reward Par 4. A big tee ball will drive the green or leave you with a short chip shot. Play safe off the tee and have a wedge for a birdie opportunity.

Tee 1: 312

Tee 2: 296

Tee 3: 281

Tee 4: 244

Tee 5: 203

18th Hole

Par 4 · 476

Pro’s Tip:
Left center of the fairway off the tee will set up a good angle to the green for your second shot. Left side is also a good play to avoid bunkers guarding the right side of the green.

Tee 1: 476

Tee 2: 446

Tee 3: 405

Tee 4: 383

Tee 5: 351

19th Hole

Par 5 · 590

Pro’s Tip:
Swing away on this wide open long Par 5. Avoid the water along the right side of the green on your second shot. You should make a birdie here.

Tee 1: 590

Tee 2: 555

Tee 3: 545

Tee 4: 519

Tee 5: 482

20th Hole

Par 4 · 400

Pro’s Tip:
A great tee ball favors the left side of the fairway. Your second shot must be accurate and aim left center to avoid the penalty area on the right.

Tee 1: 400

Tee 2: 398

Tee 3: 383

Tee 4: 359

Tee 5: 338

21st Hole

Par 3 · 181

Pro’s Tip:
Not a lot of trouble on this beautiful Par 3. Take dead aim and make a confident swing.

Tee 1: 181

Tee 2: 157

Tee 3: 146

Tee 4: 125

Tee 5: 101

22nd Hole

Par 4 · 447

Pro’s Tip:
Hit your tee ball down the right center on this beautiful Par 4. Take plenty of club for your second shot to avoid the large bunker guarding the front of this green.

Tee 1: 447

Tee 2: 410

Tee 3: 400

Tee 4: 377

Tee 5: 352

23rd Hole

Par 4 · 354

Pro’s Tip:
Take your time and make sure your tee ball hits the fairway. Your second shot must clear a large ravine that guards the front of this green. Accuracy on this hole a premium.

Tee 1: 354

Tee 2: 325

Tee 3: 314

Tee 4: 290

Tee 5: 260

24th Hole

Par 4 · 326

Pro’s Tip:
A large tee ball with a slight draw could roll out on the green. Be careful with your second shot as over the green will most likely lead to a double bogey or worse.

Tee 1: 326

Tee 2: 303

Tee 3: 293

Tee 4: 249

Tee 5: 218

25th Hole

Par 3 · 217

Pro’s Tip:
This beautiful Par 3 is well guarded by water on the left and 3 dangerous bunkers on the right. Aim right center of the green as the slope will feed most balls to the left.

Tee 1: 217

Tee 2: 186

Tee 3: 173

Tee 4: 150

Tee 5: 135

26th Hole

Par 5 · 503

Pro’s Tip:
Big hitters aim over the bunker and bust it. Otherwise play a slight draw around the bunker to set up your second shot. Stay left with your approach as water and trouble lurk down the right side.

Tee 1: 503

Tee 2: 484

Tee 3: 456

Tee 4: 418

Tee 5: 361

27th Hole

Par 4 · 450

Pro’s Tip:
Swing away on this beautiful wide open Par 4. Deep bunkers surround the left and right side of the green so your approach must be accuraate if you want to finsih this side with a birdie.

Tee 1: 450

Tee 2: 422

Tee 3: 410

Tee 4: 308

Tee 5: 365

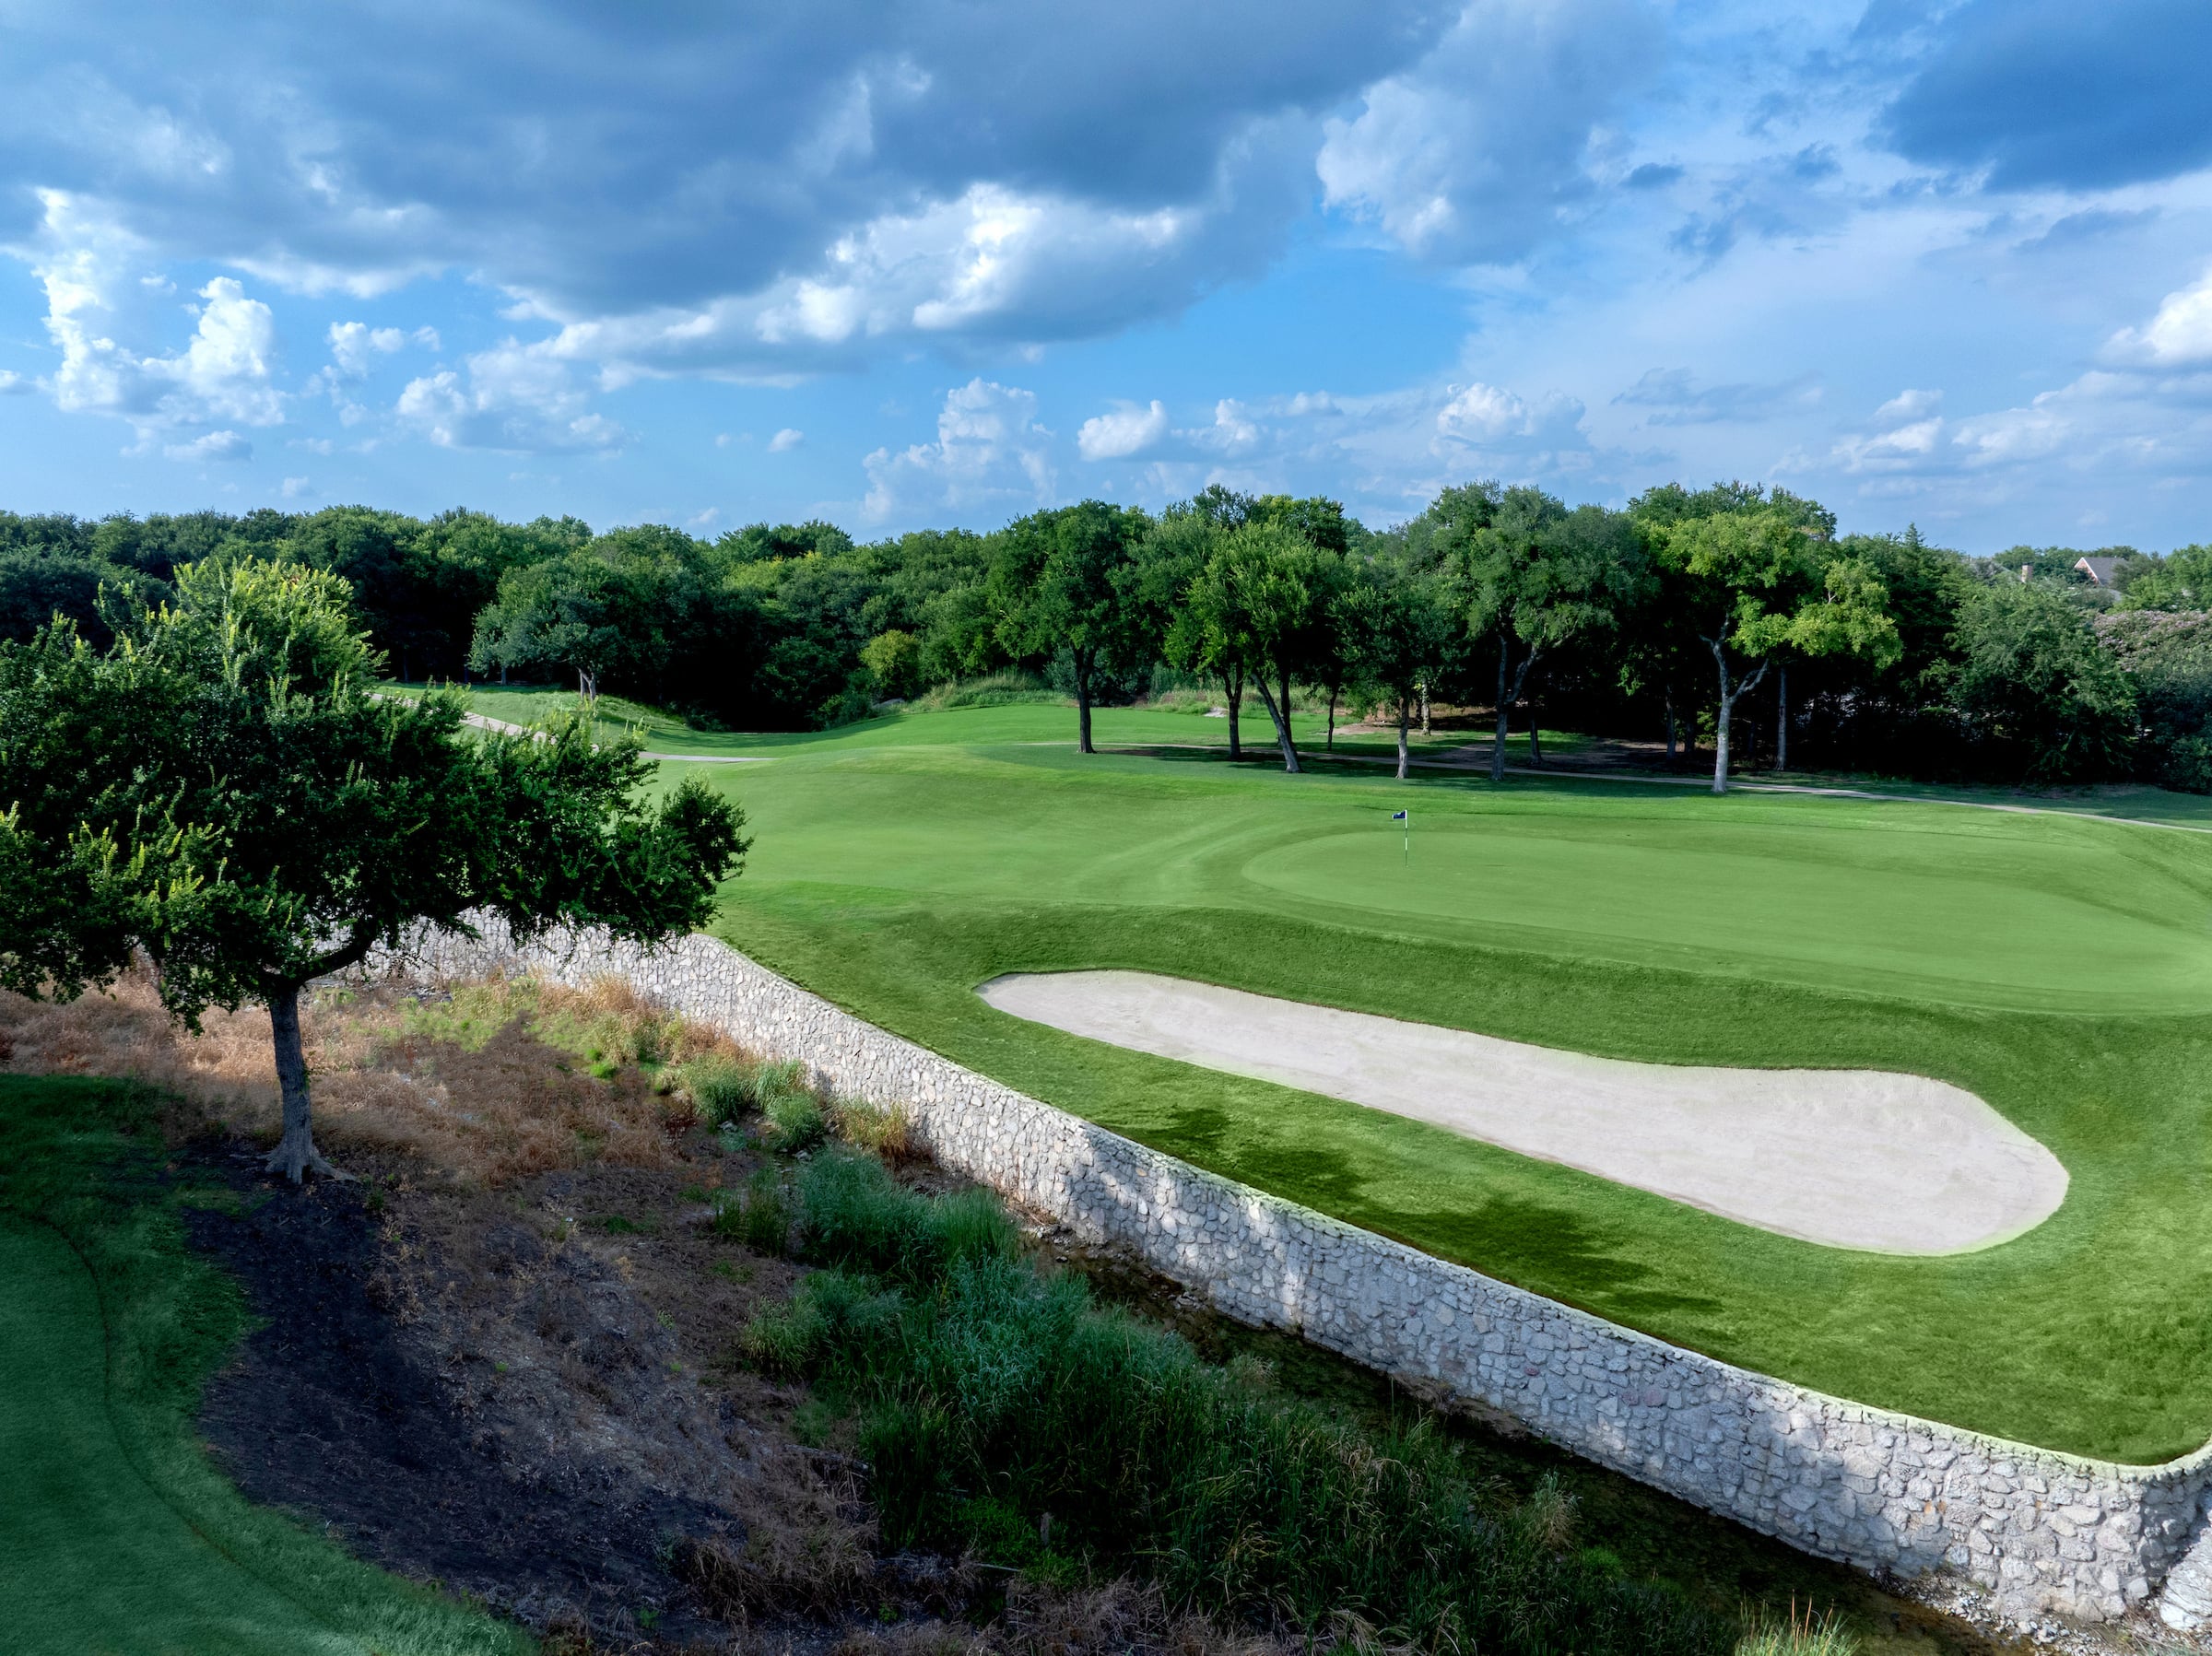
THE HILLS COURSE GALLERY

Explore the course, practice facilities, and scenic views that define golf at Stonebridge Ranch.

BECOME A MEMBER

More golf. More amenities. More ways to connect. Membership opens the door to two exceptional club experiences in McKinney.

Explore Memberships

MEET THE MEMBERSHIP TEAM

Our membership team is available to answer questions and guide you through the process.

FREQUENTLY ASKED QUESTIONS

How many golf courses does your Club have?
Members enjoy access to two courses and 45 holes of golf: the 18-hole Dye Course and the 27-hole Hills Course, both offering distinct layouts and scenic views.
What makes the golf experience at your Club unique?
One membership provides access to two distinct golf experiences and 45 holes of championship golf. Members enjoy the strategic challenges of the Pete Dye Course, the variety of the Arthur Hills-designed Hills Course, dedicated practice facilities at both locations, and a robust calendar of tournaments, leagues, and events.
Can I play the course with my membership?
Yes. Golf Members enjoy full access to golf, along with practice facilities and club amenities that support both casual and competitive play.
Do you offer golf instruction?
Absolutely. The Club offers professional instruction led by experienced golf professionals, with private lessons, group clinics, and player development programs designed for all skill levels.
Are golf programs available for juniors?
Yes. Junior golfers can participate in a variety of programs focused on skill-building, sportsmanship, and fun. From introductory clinics to more advanced training opportunities, the Club fosters a strong foundation and love for the game.
Do you offer private golf lessons?
Yes. Our certified instructors provide lessons for all skill levels.
Are group clinics available?
Yes. Group lessons, junior programs, and seasonal clinics are offered.
Do you provide club fitting services?
Yes. Professional fittings are available with top golf brands in our Pro Shop.
Can I store my clubs at the club?
Yes. Club storage is available to Members.
Do you offer club repair?
Yes. The Golf Shop provides regripping and basic repair services.
Is there a junior golf program?
Yes. Junior golf instruction, leagues, and seasonal camps all help make learning the game fun and engaging.

More Great Golf Nearby

Through Invited and XLife benefits, nearby clubs offer more ways to play, practice, and explore different course designs without leaving the region.