COURSE INFO
The Seminole Course at White Oak Golf Club in Newnan, Georgia—just south of Atlanta—first debuted as an 18-hole championship course in 1986. Two additional nines were added in 1987 and 1990, creating the 36-hole layout Members enjoy today. Designed by Rocky Roquemore, the club has long been a favorite among Atlanta-area golfers and their guests.
Holes: 18 Par: 72 Rating: 74.5 Slope: 144 Yardage: 7,253
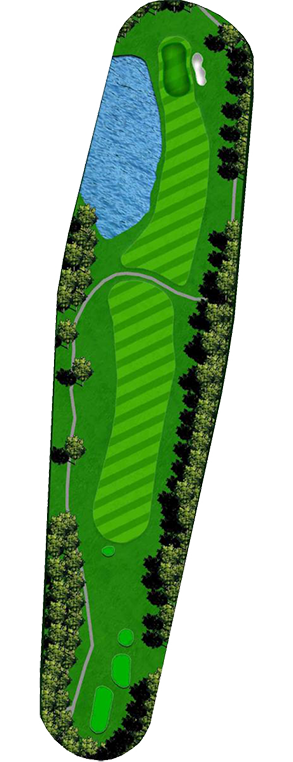
1st Hole
Par 4 · 398
Tee 1: 398
Tee 2: 370
Tee 3: 351
Tee 4: 301
Tee 5: 301
Tee 6: 301
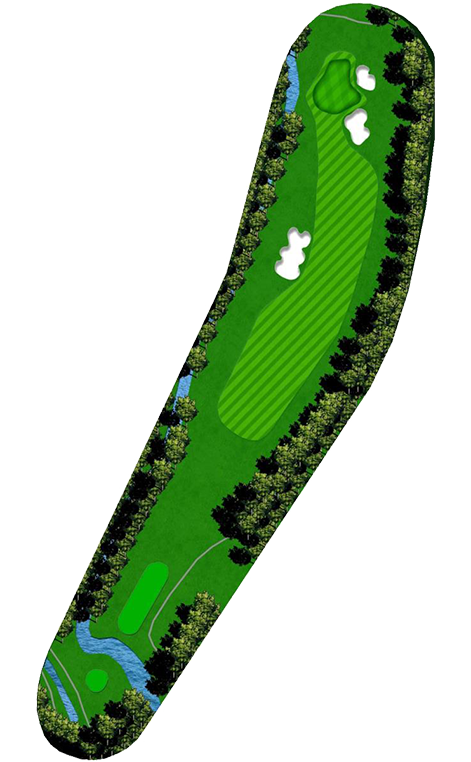
2nd Hole
Par 3 · 169
Tee 1: 169
Tee 2: 150
Tee 3: 141
Tee 4: 117
Tee 5: 117
Tee 6: 117
3rd Hole
Par 5 · 481
Tee 1: 481
Tee 2: 453
Tee 3: 418
Tee 4: 418
Tee 5: 351
Tee 6: 325
4th Hole
Par 4 · 369
Tee 1: 369
Tee 2: 326
Tee 3: 314
Tee 4: 314
Tee 5: 226
Tee 6: 226
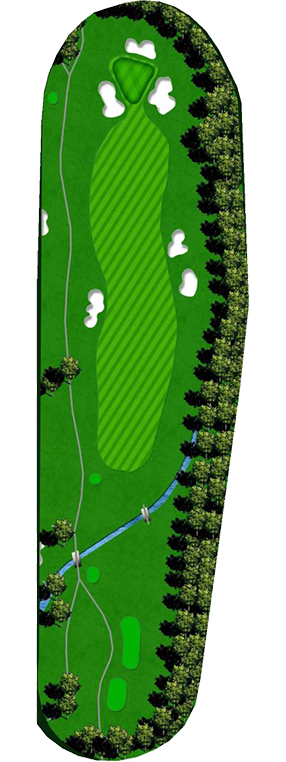
5th Hole
Par 4 · 390
Tee 1: 390
Tee 2: 363
Tee 3: 349
Tee 4: 314
Tee 5: 314
Tee 6: 255
6th Hole
Par 5 · 523
Tee 1: 523
Tee 2: 491
Tee 3: 466
Tee 4: 466
Tee 5: 394
Tee 6: 301

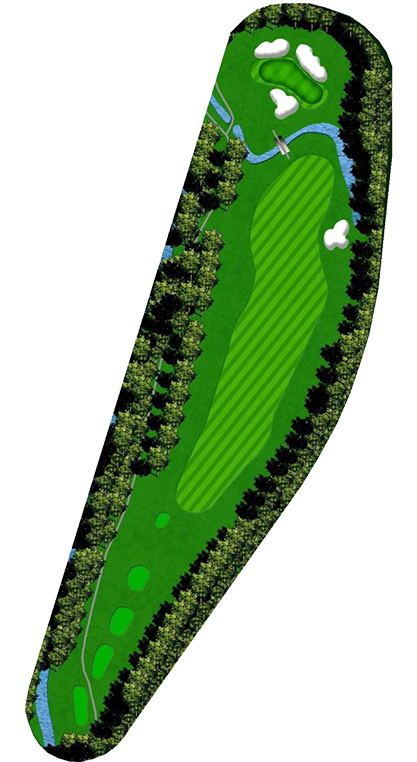
7th Hole
Par 4 · 390
Tee 1: 390
Tee 2: 361
Tee 3: 336
Tee 4: 309
Tee 5: 307
Tee 6: 273
8th Hole
Par 3 · 196
Tee 1: 196
Tee 2: 172
Tee 3: 162
Tee 4: 142
Tee 5: 142
Tee 6: 80
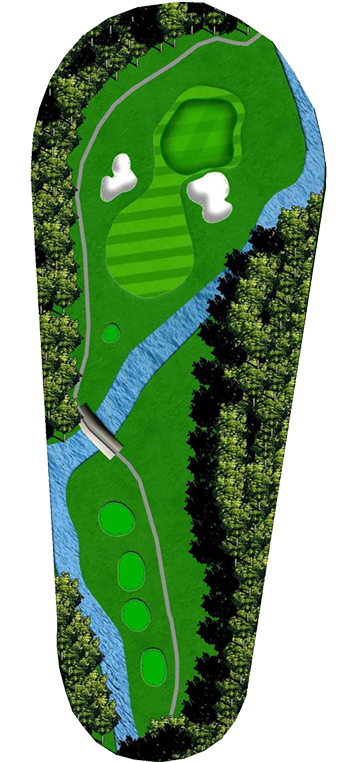
9th Hole
Par 4 · 401
Tee 1: 401
Tee 2: 389
Tee 3: 377
Tee 4: 317
Tee 5: 317
Tee 6: 247
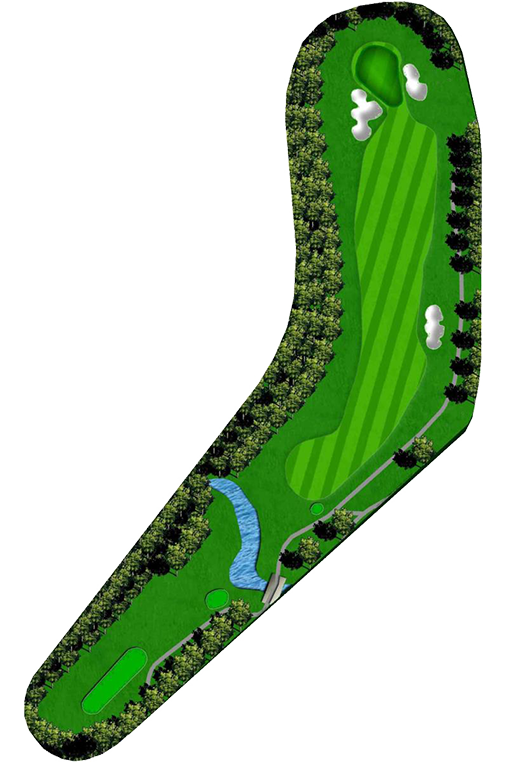
10th Hole
Par 5 · 523
Tee 1: 523
Tee 2: 510
Tee 3: 500
Tee 4: 439
Tee 5: 439
Tee 6: 376
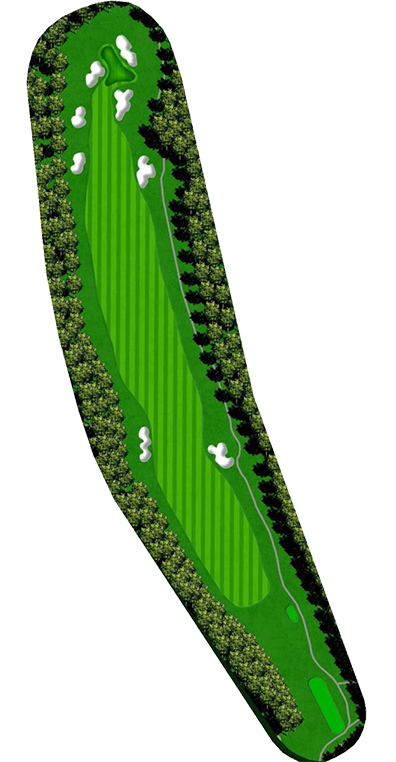
11th Hole
Par 4 · 338
Tee 1: 338
Tee 2: 330
Tee 3: 312
Tee 4: 312
Tee 5: 258
Tee 6: 217
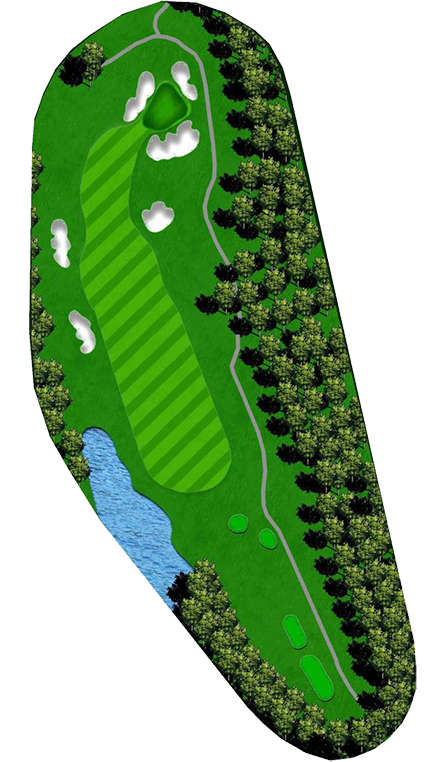
12th Hole
Par 4 · 331
Tee 1: 331
Tee 2: 321
Tee 3: 311
Tee 4: 224
Tee 5: 224
Tee 6: 149
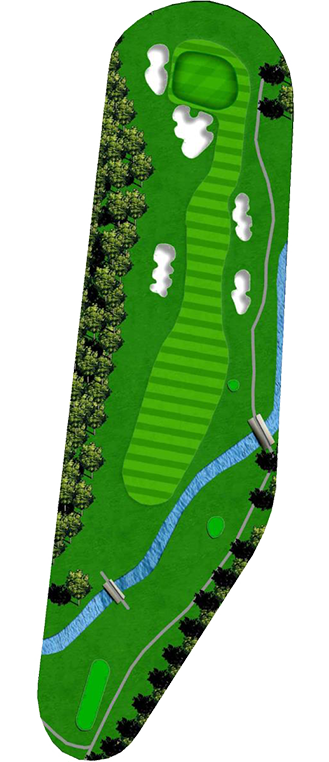
13th Hole
Par 3 · 179
Tee 1: 179
Tee 2: 171
Tee 3: 148
Tee 4: 148
Tee 5: 101
Tee 6: 101
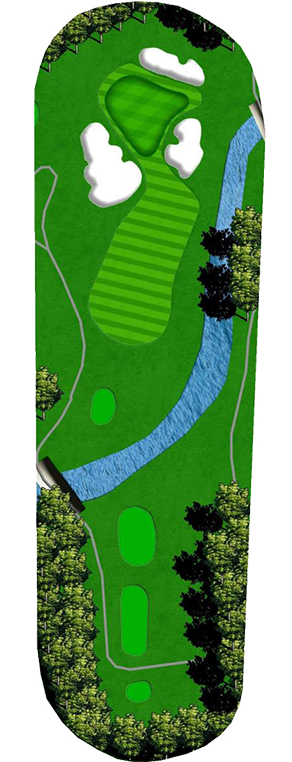
14th Hole
Par 4 · 333
Tee 1: 333
Tee 2: 313
Tee 3: 307
Tee 4: 307
Tee 5: 245
Tee 6: 240
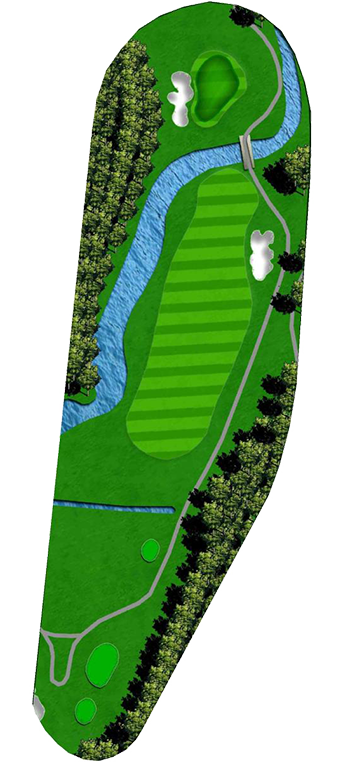
15th Hole
Par 3 · 169
Tee 1: 169
Tee 2: 149
Tee 3: 143
Tee 4: 143
Tee 5: 127
Tee 6: 90
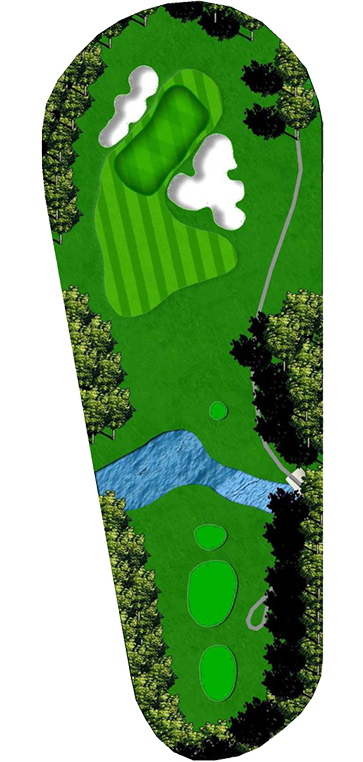
16th Hole
Par 4 · 380
Tee 1: 380
Tee 2: 368
Tee 3: 356
Tee 4: 291
Tee 5: 291
Tee 6: 222
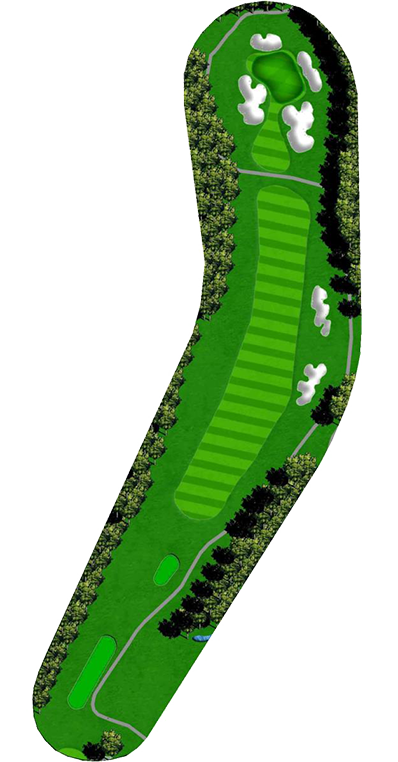
17th Hole
Par 5 · 553
Tee 1: 553
Tee 2: 525
Tee 3: 493
Tee 4: 463
Tee 5: 463
Tee 6: 347
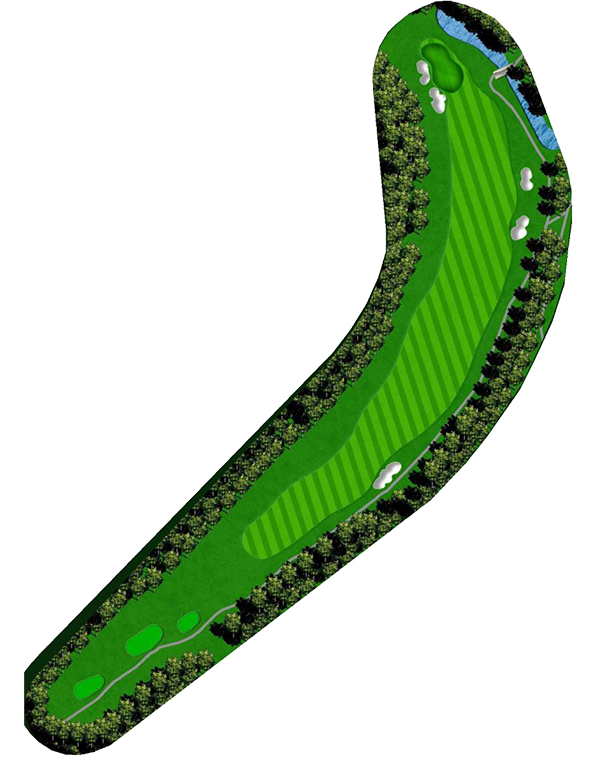
18th Hole
Par 4 · 416
Tee 1: 416
Tee 2: 405
Tee 3: 393
Tee 4: 306
Tee 5: 306
Tee 6: 272
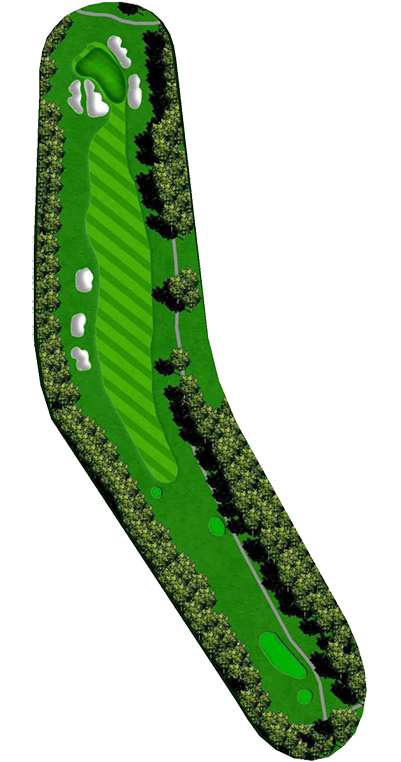
"Great golf course and nice club. Good food and friendly service. Always enjoy some food/drinks after a round of 18."
Review | Yelp
"Not far from Peachtree City, Braelinn Golf Club offers terrific views and challenging play for golfers at every skill level. Well-groomed fairways and greens keep Braelinn Golf Club difficult yet friendly, and the staff can offer tips and tricks for playing your best round."
Review | GolfNow
"Great course and outdoor seating for our large group. The food was good and the service was excellent. We enjoyed the pool too. Easy parking and super clean."
Mercedes F | Member
Ready to Play?


Join The Clubs of Peachtree City and Newnan
Unlock access to five premier clubs in the Atlanta area.
FREQUENTLY ASKED QUESTIONS
Do I need a golf membership to play?
How many golf courses are available?
Do you offer golf lessons or clinics?
Are there youth or junior golf programs?
Can I host a golf outing or tournament?
Is there a dress code on the golf courses?
Are club rentals or fittings available?
What practice facilities are available?
Do I have access to all five clubs with one membership?
What types of memberships are available?
Do I have to be a resident of Peachtree City or Newnan to join?
Can families be included in one membership?
Are there social and dining benefits beyond golf?
How do I learn more or schedule a tour?
Discover Our Nearby Clubs
Considering other options or looking for the perfect fit for your guest list and style? Explore nearby Invited Clubs. Each offering beautiful indoor and outdoor event spaces, full-service planning, and exclusive wedding experiences.

Atlanta National Golf Club
Milton, GANestled in the rolling hills of Milton, Atlanta National Golf Club is a private, Pete and P.B. Dye–designed course celebrated for its challenging layout and natural beauty. The 18-hole championship course features striking elevation changes, sculpted fairways, and a signature island green on the 17th hole.

Brookfield Country Club
Roswell, GALocated in the heart of Roswell, Brookfield Country Club blends traditional Southern hospitality with a fresh, modern spirit. Its 18-hole championship course offers challenge and variety, while recent renovations have transformed the clubhouse into a welcoming retreat for dining, fitness, and social events.

Polo Golf & Country Club
Cumming, GASurrounded by lush woodlands in Forsyth County, Polo Golf & Country Club combines exceptional golf with an inviting country club lifestyle. The Joe Lee–designed course offers play for every level, while the 30,000-square-foot clubhouse serves as a social hub for dining, events, and family gatherings.